Creating Your First Intervention
Step-by-step guide to recording your first tree planting intervention in TreeMapper.
An intervention in TreeMapper is any forestry action you document—such as planting trees, removing invasive species, or maintaining existing forests. This tutorial will walk you through creating your first tree planting intervention.
Before You Begin
Make sure you have:
- Installed and set up the TreeMapper mobile app
- Granted location permissions
- GPS signal (you should see your location on the map)
- Selected an active project (optional - only if you're signed in and want to upload to server)
Step 1: Navigate to the Map
Open the TreeMapper app and tap on the Map tab at the bottom of the screen. You should see an interactive map centered on your current location.
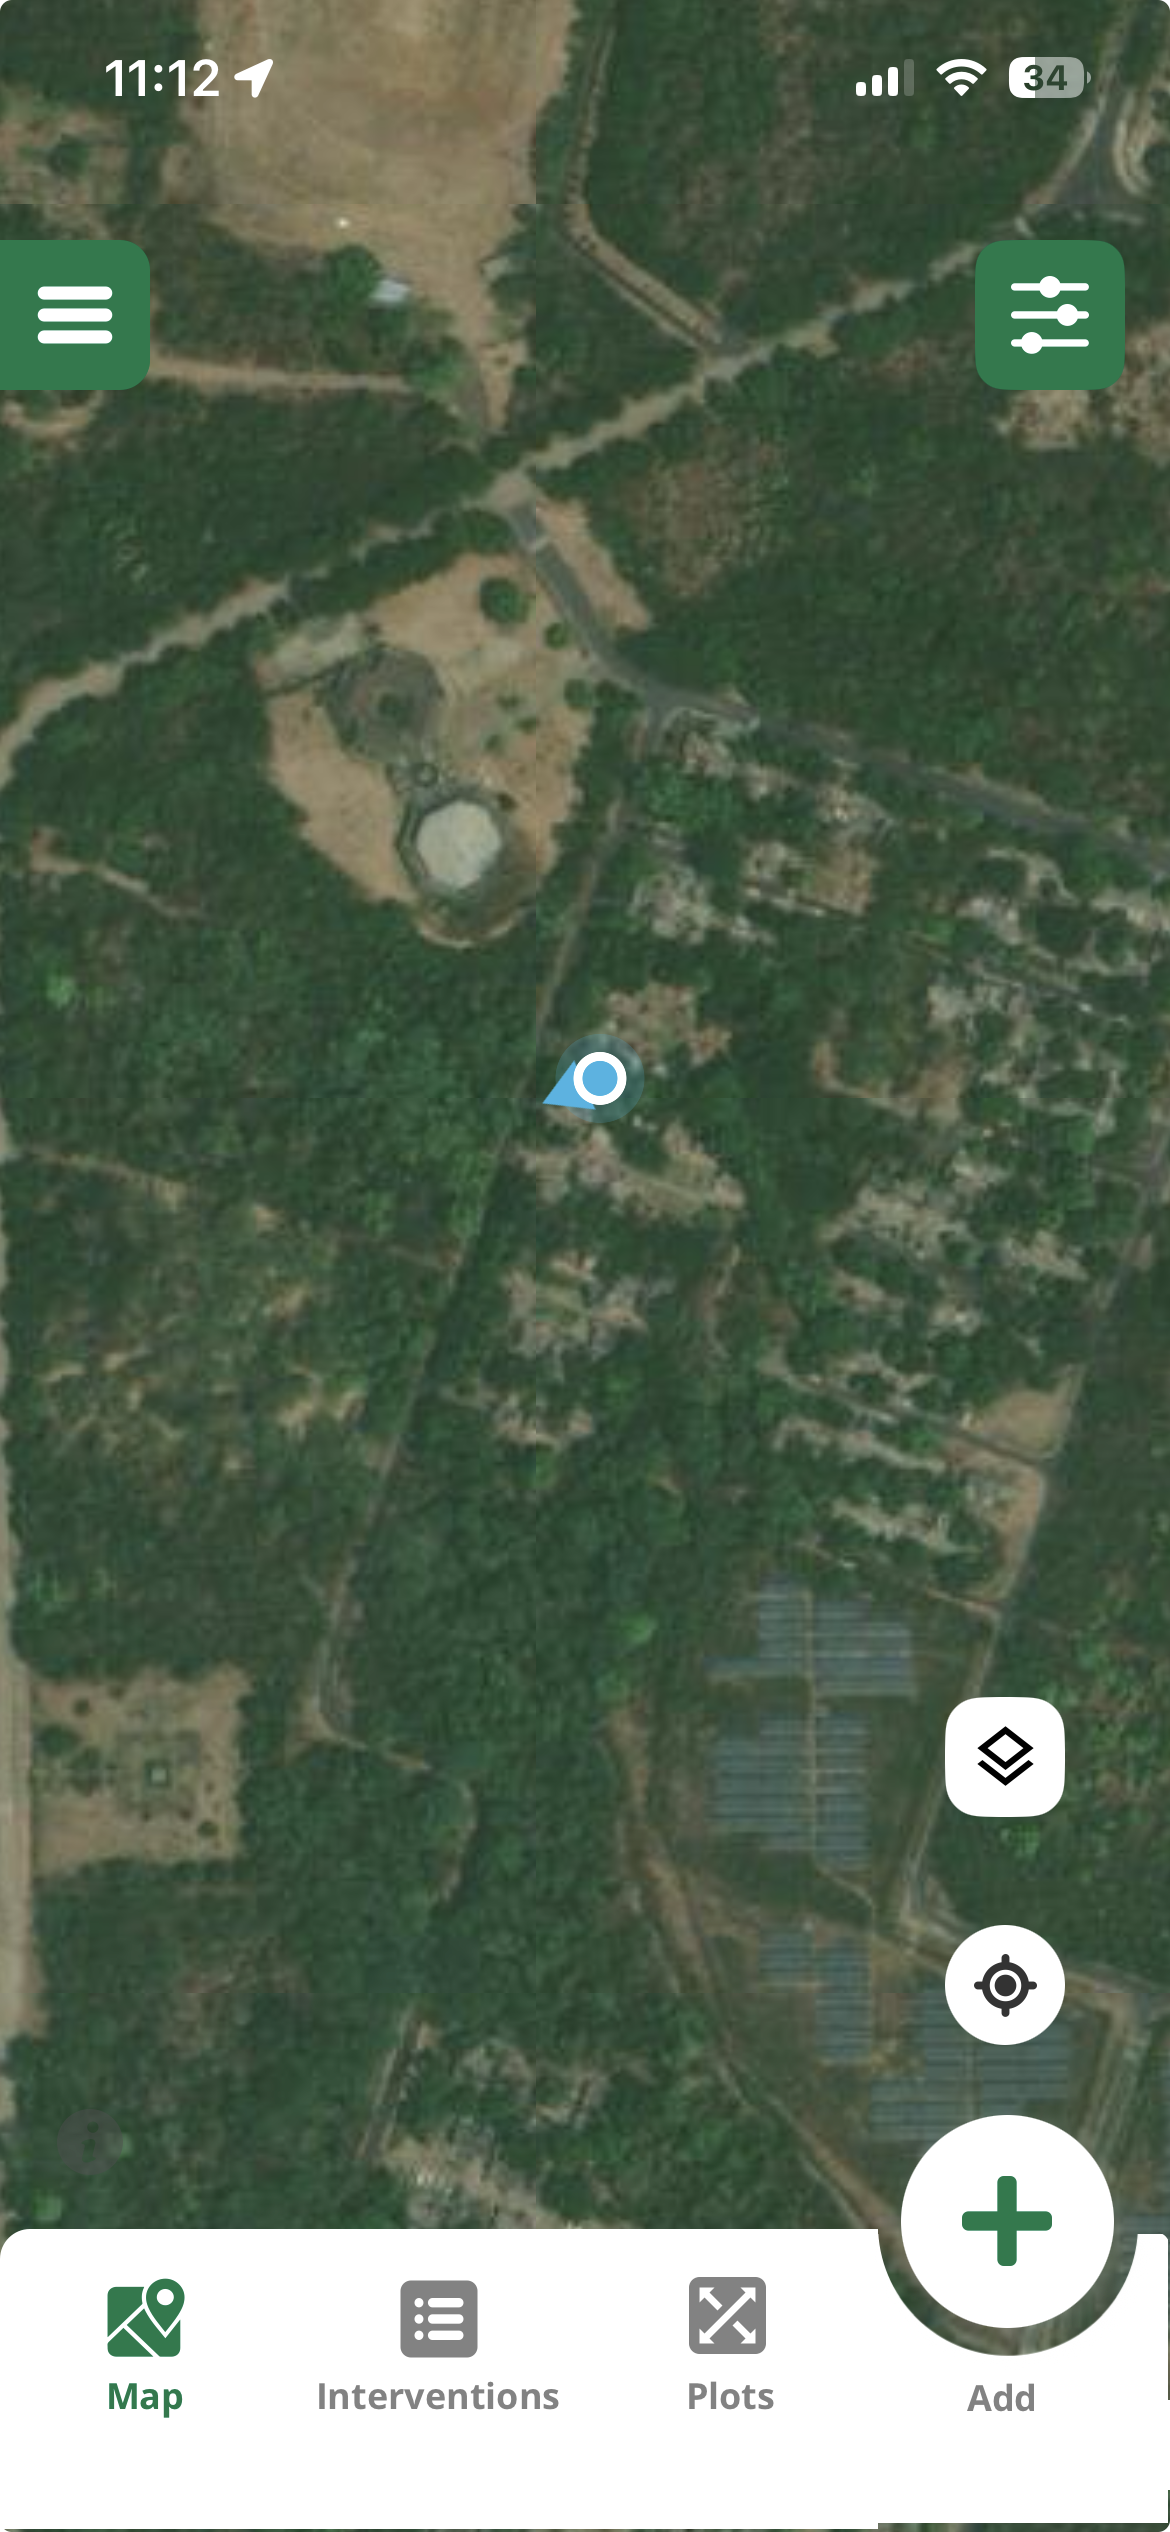
Map View
Screenshot of the TreeMapper map interface showing user location
Tip
If you don't see your location, make sure GPS is enabled and you have location permissions granted. It may take a few seconds to acquire a GPS signal.
Step 2: Start a New Intervention
Tap the large + (plus) button at the bottom center of the screen to create a new intervention.
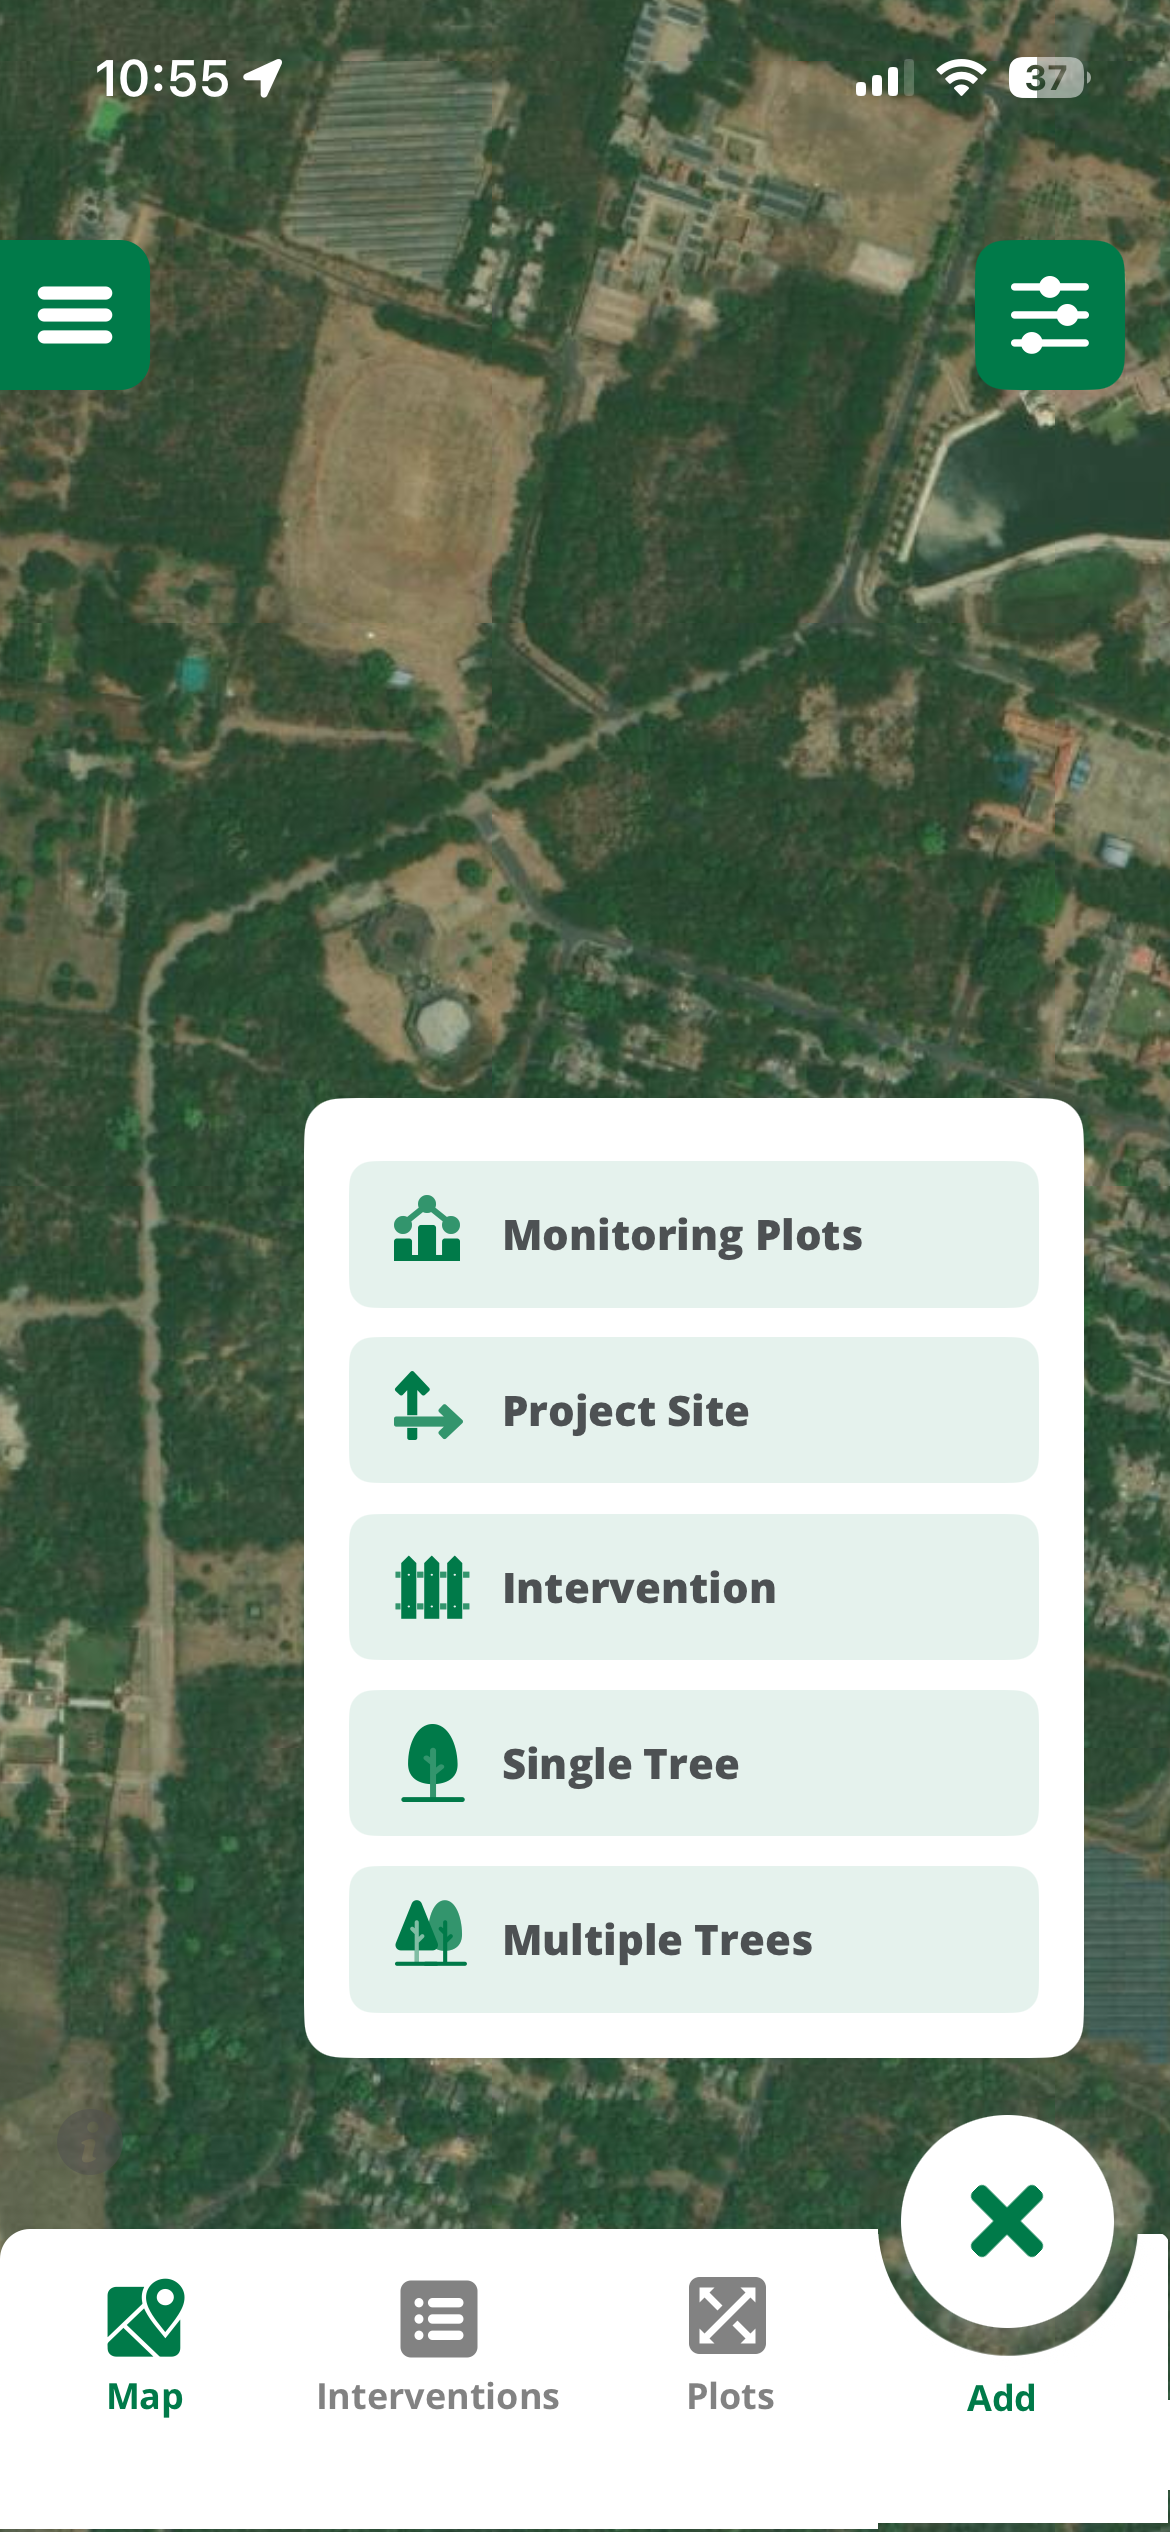
Add Button
Screenshot highlighting the + button to create new intervention
Step 3: Select Intervention Type
Choose the type of intervention you want to create. TreeMapper supports multiple types:
- Single Tree: For planting individual trees
- Multi-Tree: For planting multiple trees in an area
- Regeneration: Natural forest regeneration
- Maintenance: Tree care and maintenance activities
- Removal: Removing invasive species or dead trees
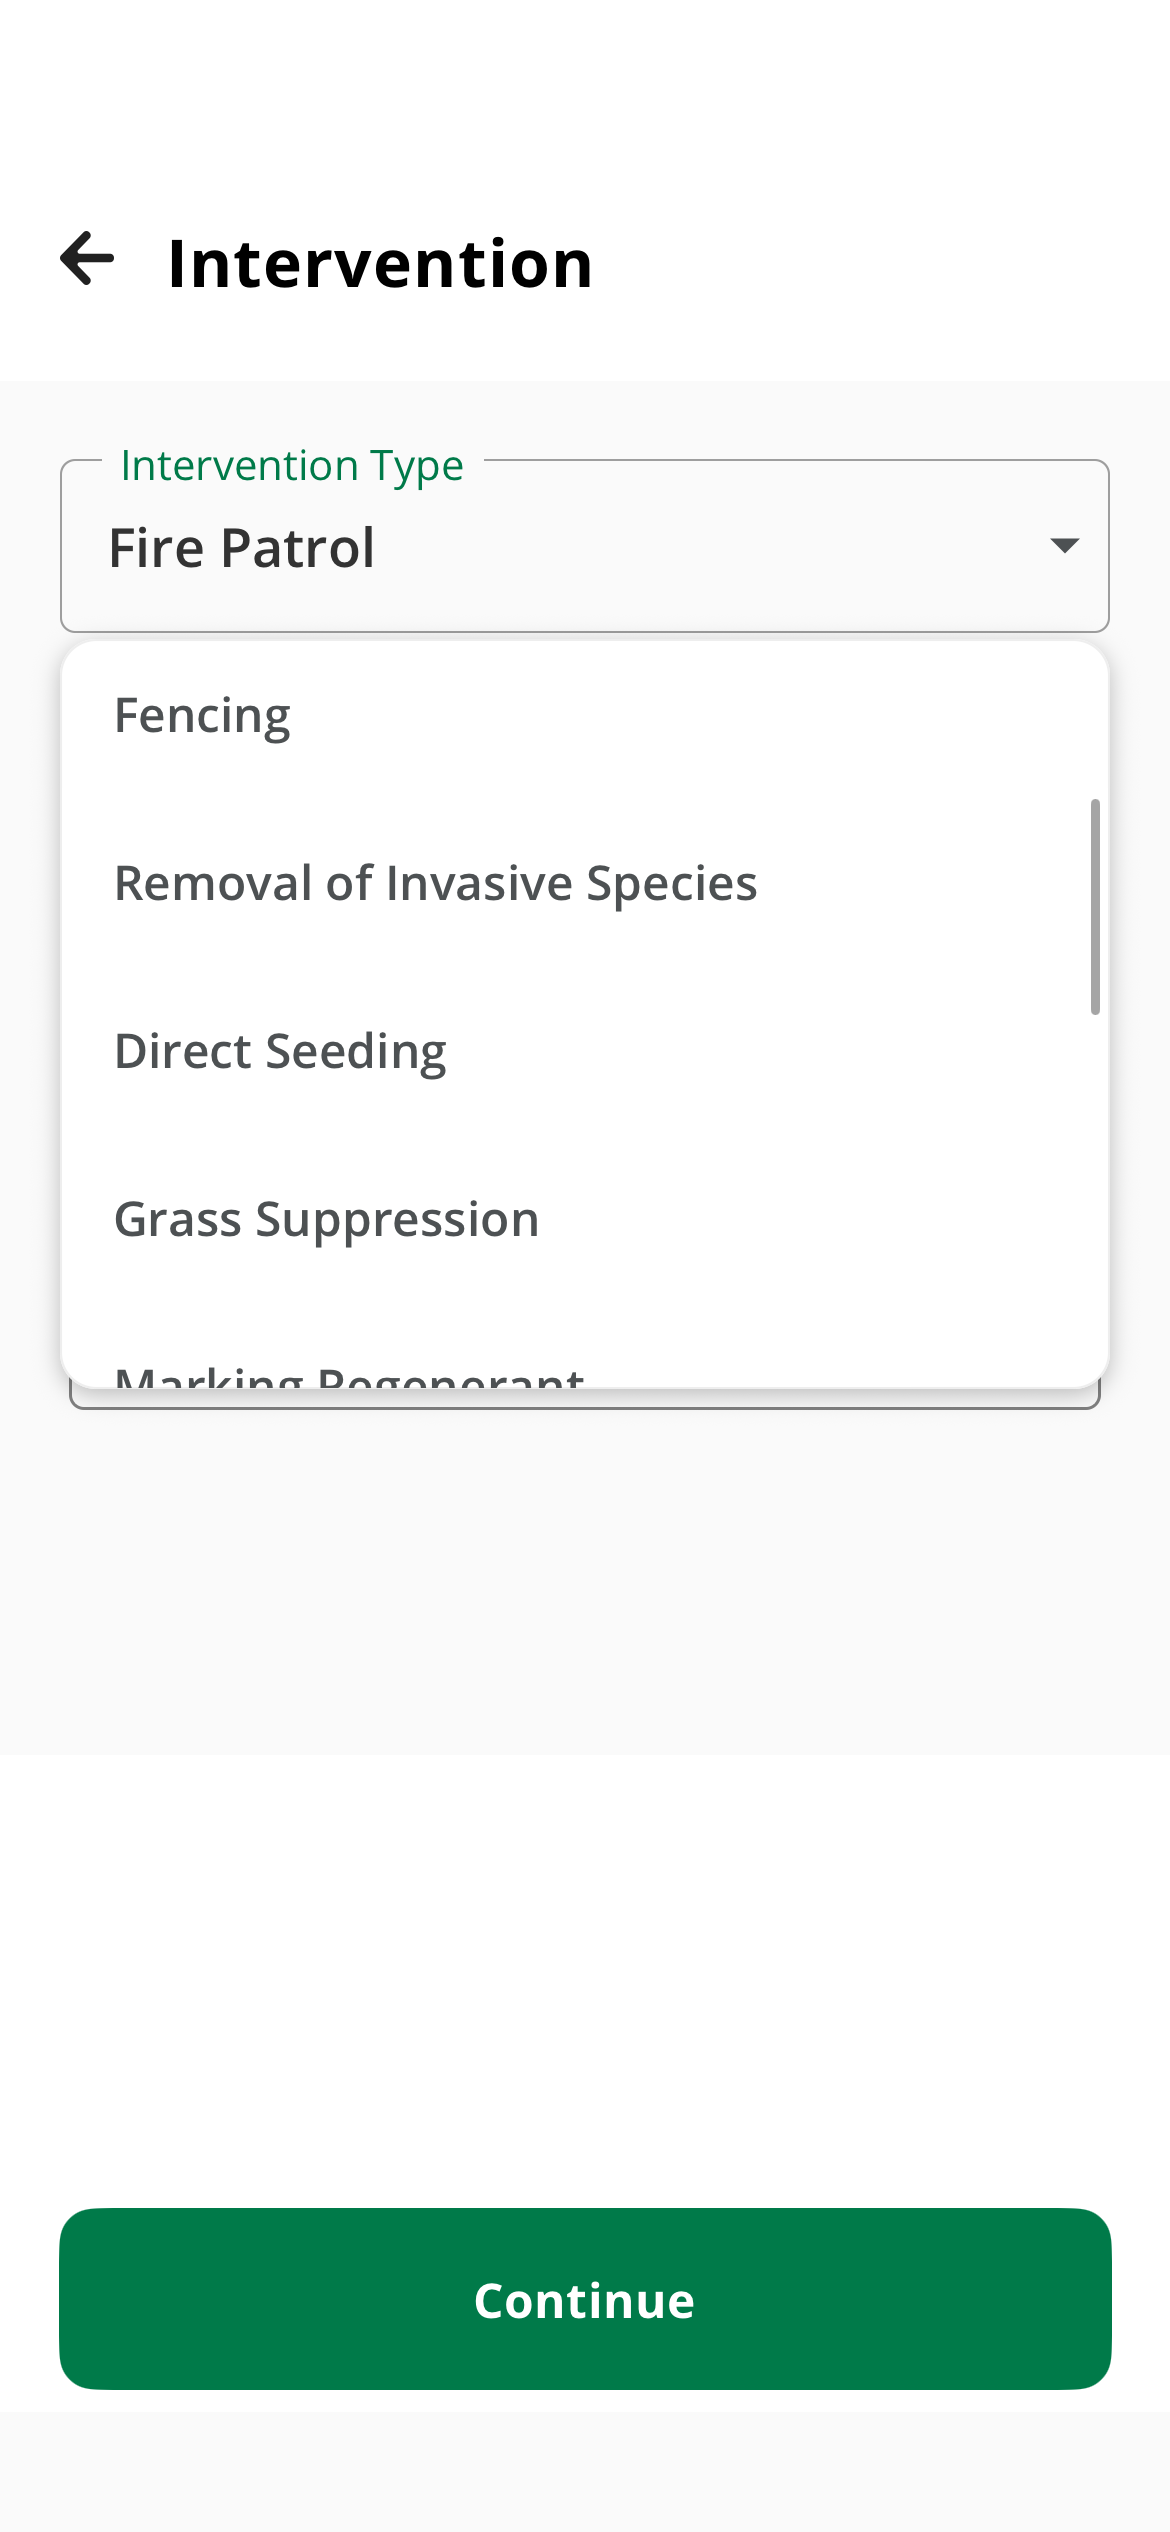
Intervention Types
Screenshot showing intervention type selection screen
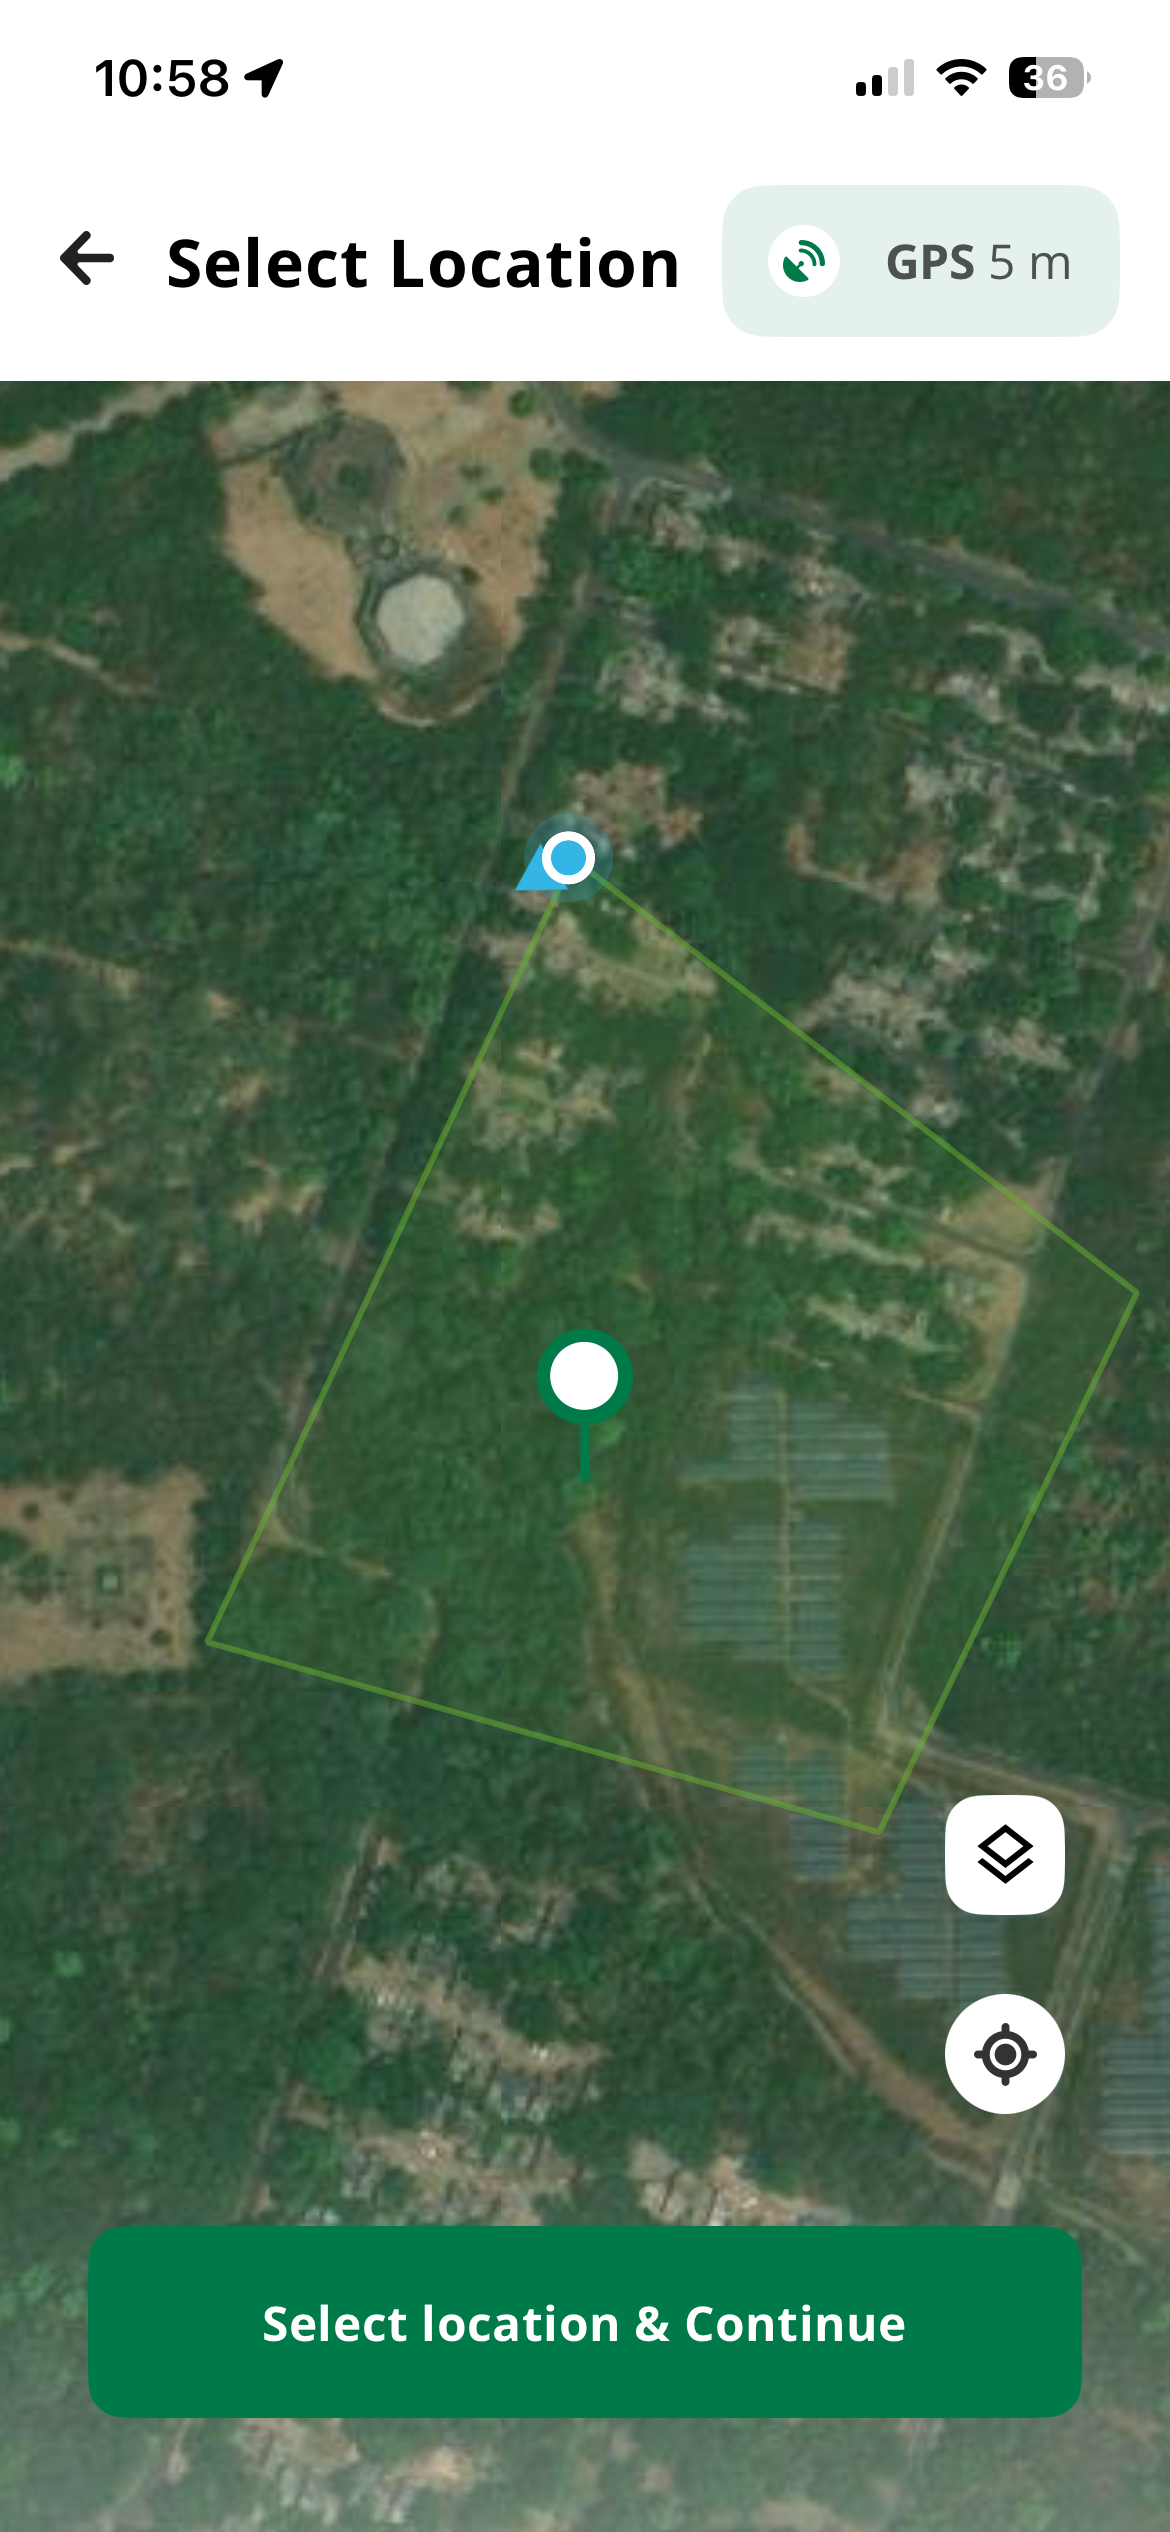
Step 4: Mark the Location
After selecting the intervention type, mark where the intervention is taking place:
Point Location (Single Tree)
For a single tree, simply tap on the map where the tree is located. A marker will appear at that location.
Polygon Area (Multi-Tree)
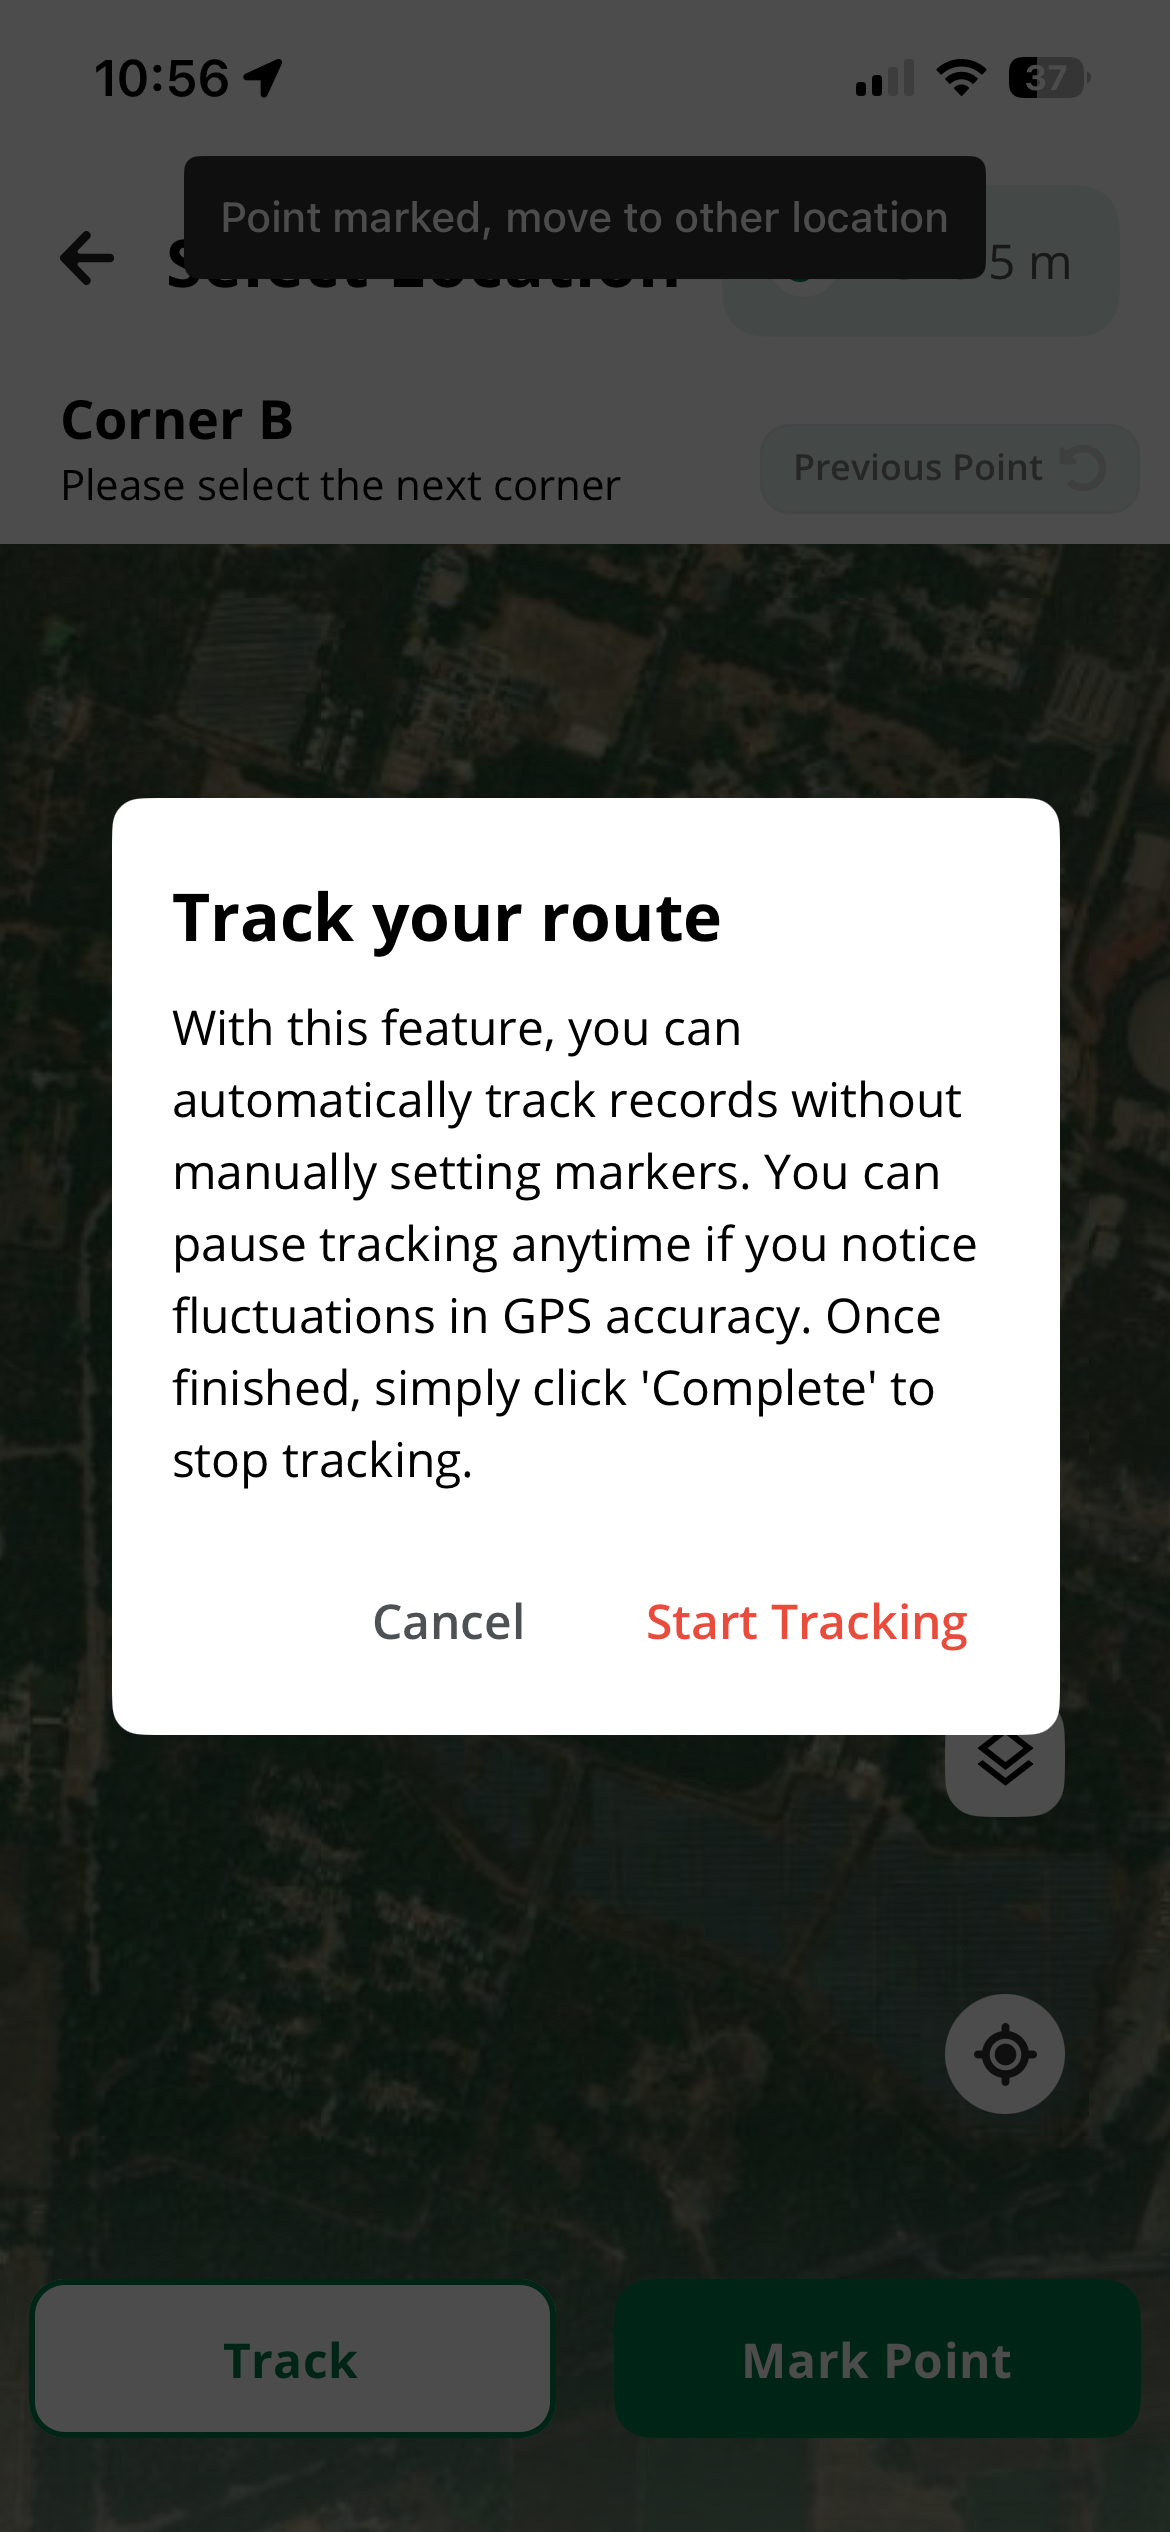
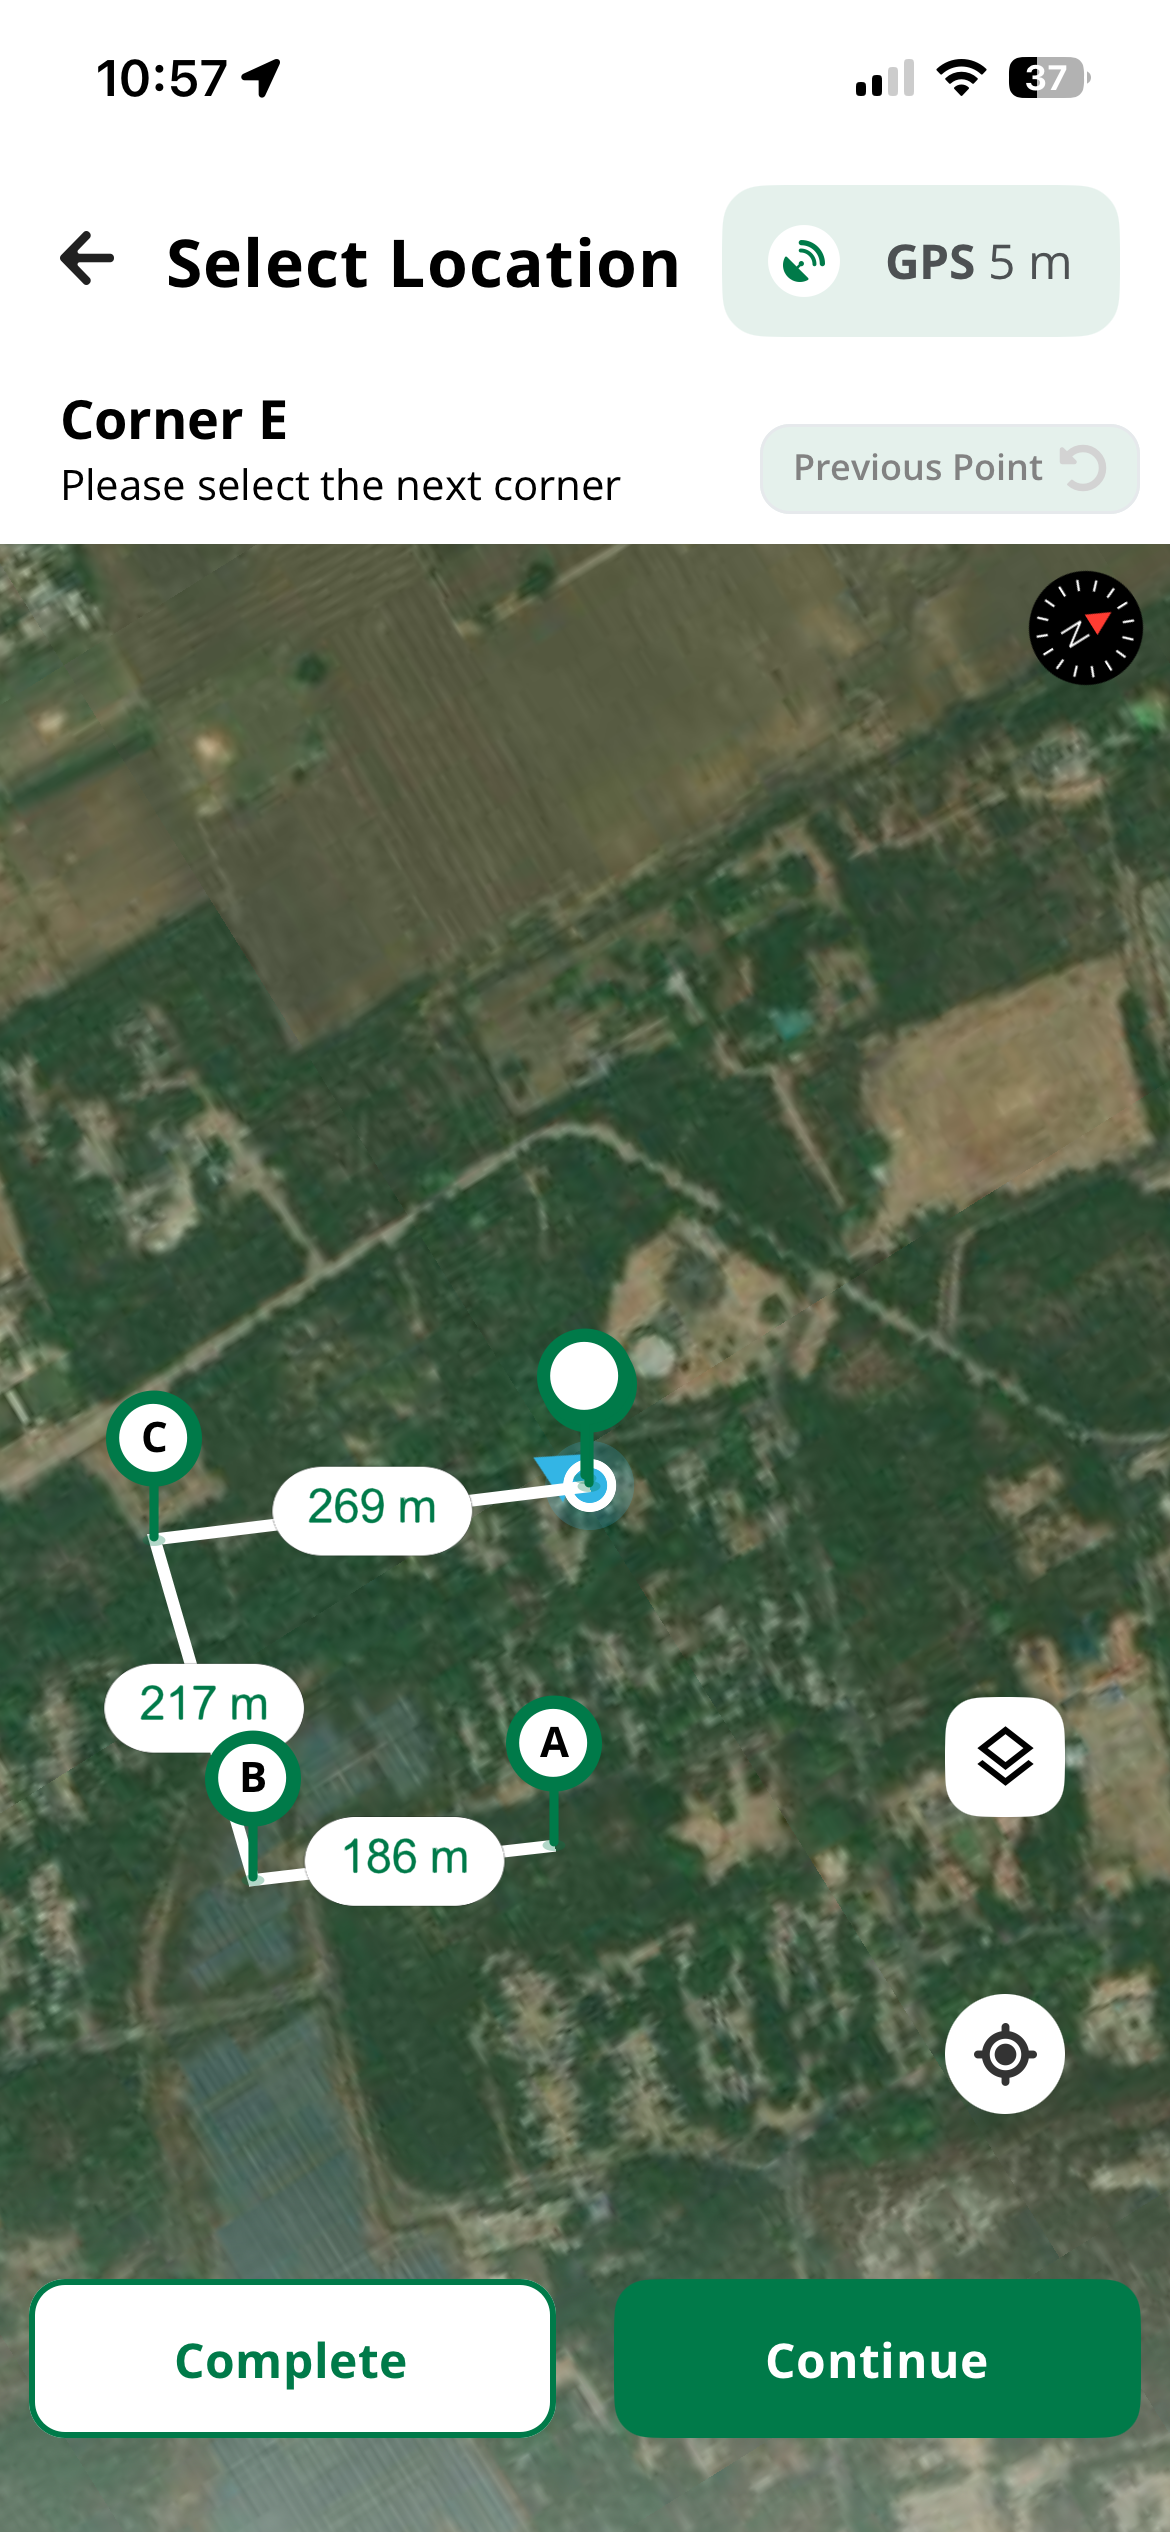
For planting multiple trees over an area:
- Walk to the first corner of your planting area
- Tap to place the first point
- Walk to each corner, tapping to place additional points
- Tap the first point again to close the polygon
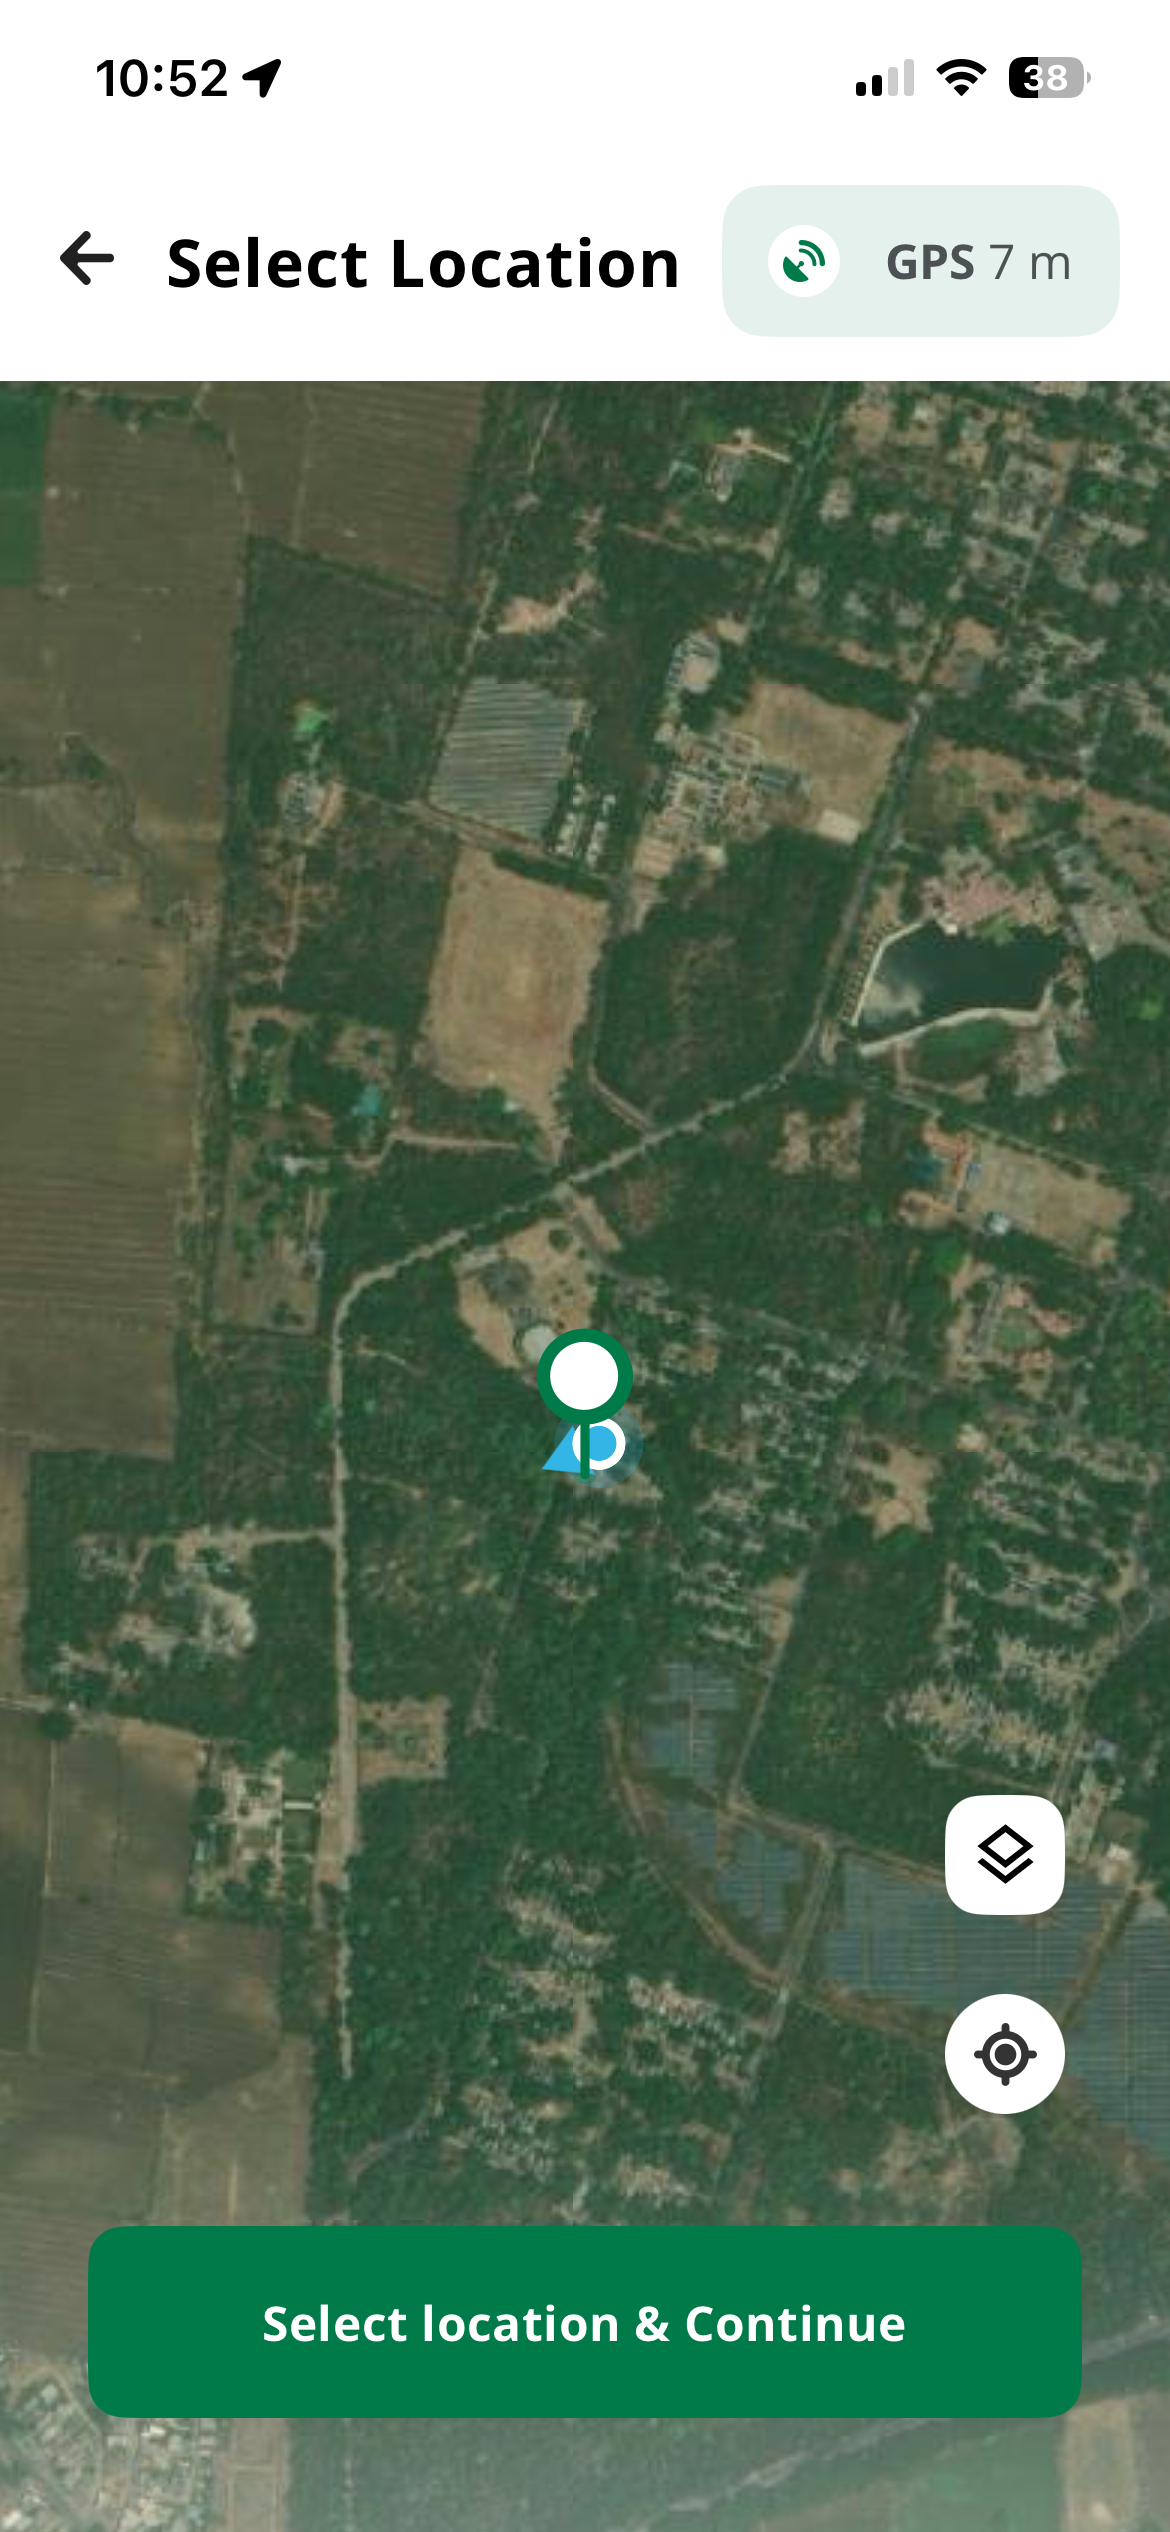
Point Location (Single Tree)
Trace Area by Walking
Multi Plant Location Selection
Point Location (Single Tree)
Trace Area by Walking
Multi Plant Location Selection
Pro Tip
For accurate polygon mapping, walk slowly around the perimeter of your planting area. The app will track your GPS position automatically. You can edit the polygon later if needed.
Step 5: Select Species (If Intervention Supports)
If your intervention type supports species selection (like Single Tree or Multi-Tree), specify which tree species you're planting:
- Tap on Add Species
- Search for the species by common or scientific name
- Select the species from the results
- Enter the number of trees being planted (for multi-tree interventions)
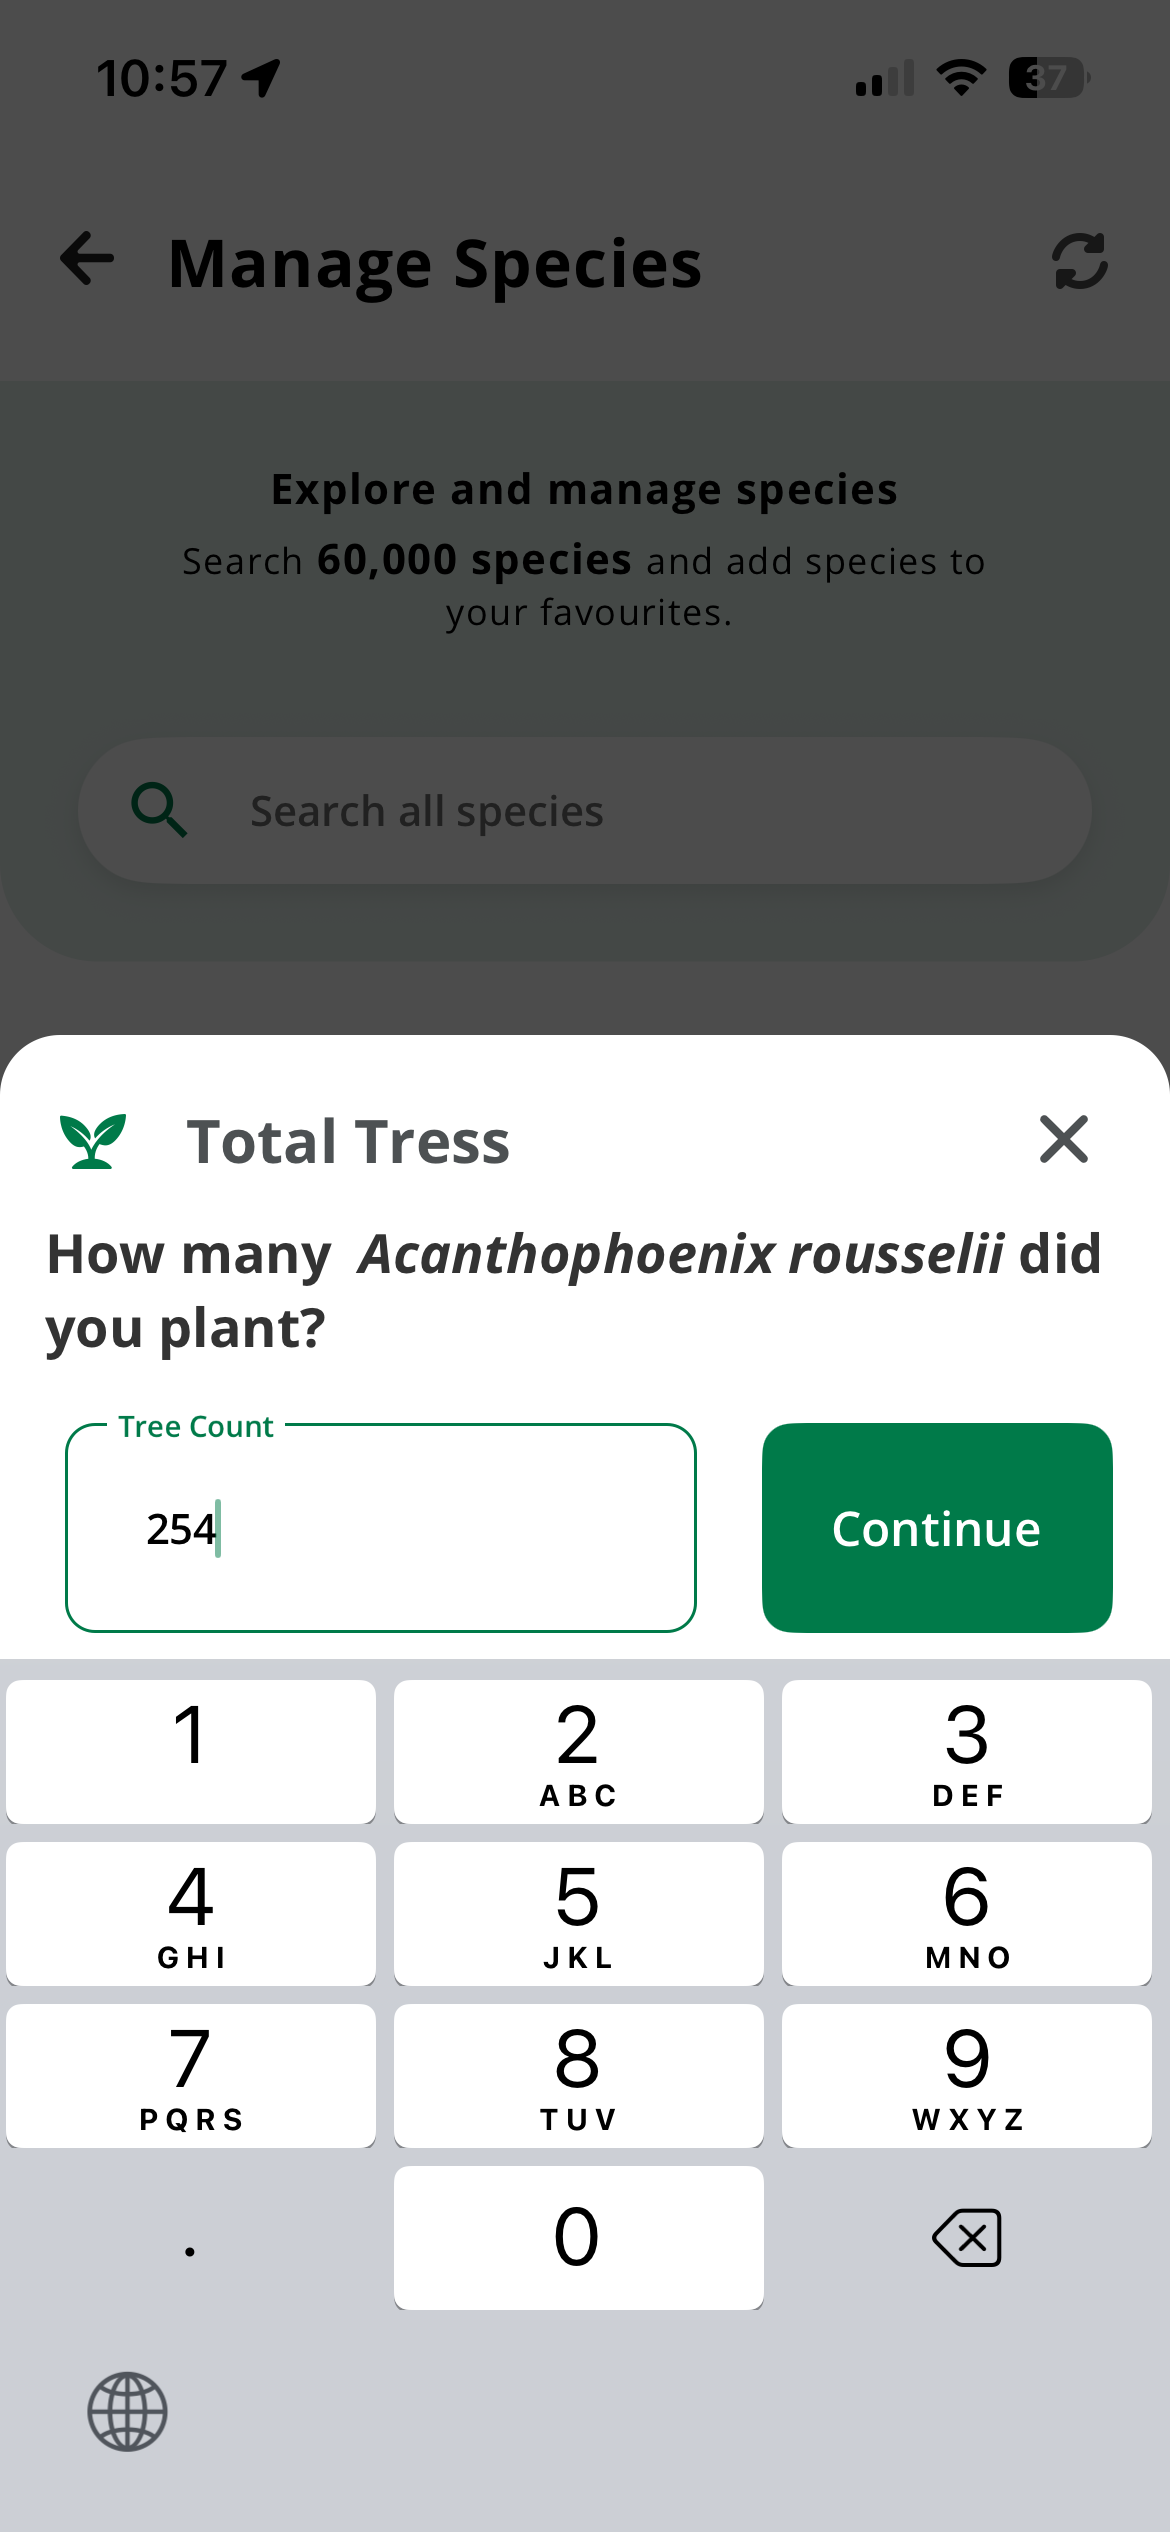
Add Number of Trees
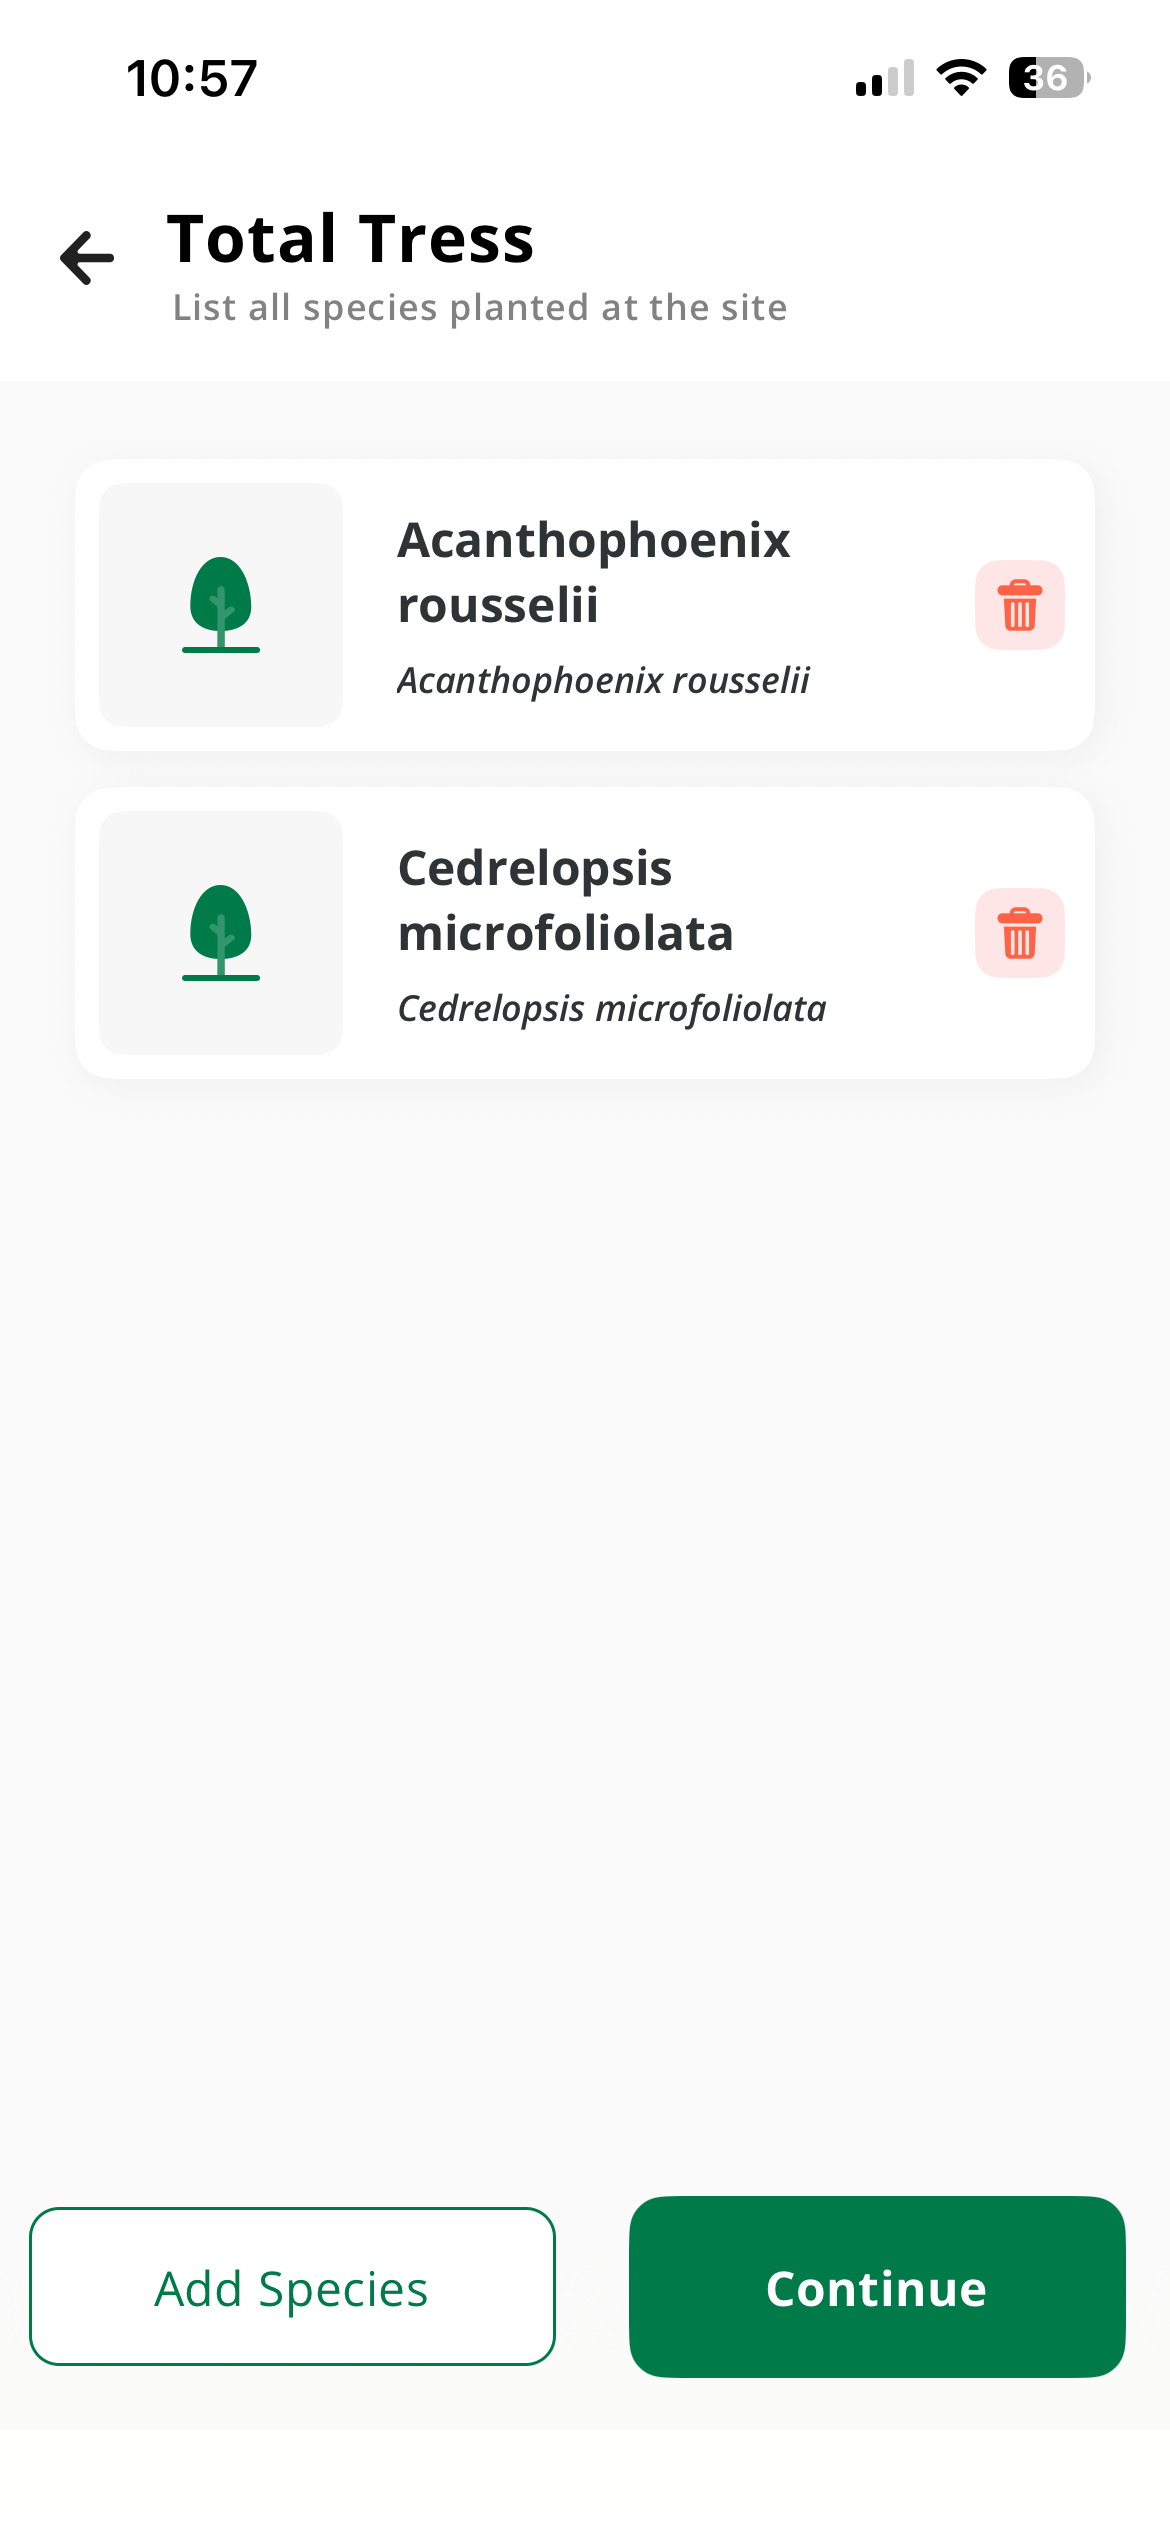
Total Trees and Species Selection
Add Number of Trees
Total Trees and Species Selection
Note
If you can't find your species in the database, you can add a custom species or contact your project administrator. Learn more in the Managing Species guide.
Step 6: Capture Photo (For Single Tree/Multi-Tree)
Note: Photo capture is only available for interventions that support tree planting (Single Tree or Multi-Tree) after you've selected the location.
Photo documentation is crucial for monitoring progress over time. Take at least one photo of your intervention site:
- Tap the camera icon
- Take a photo of the planting area or tree
- Review and confirm the photo
- Add more photos if desired (recommended: before, during, and after shots)
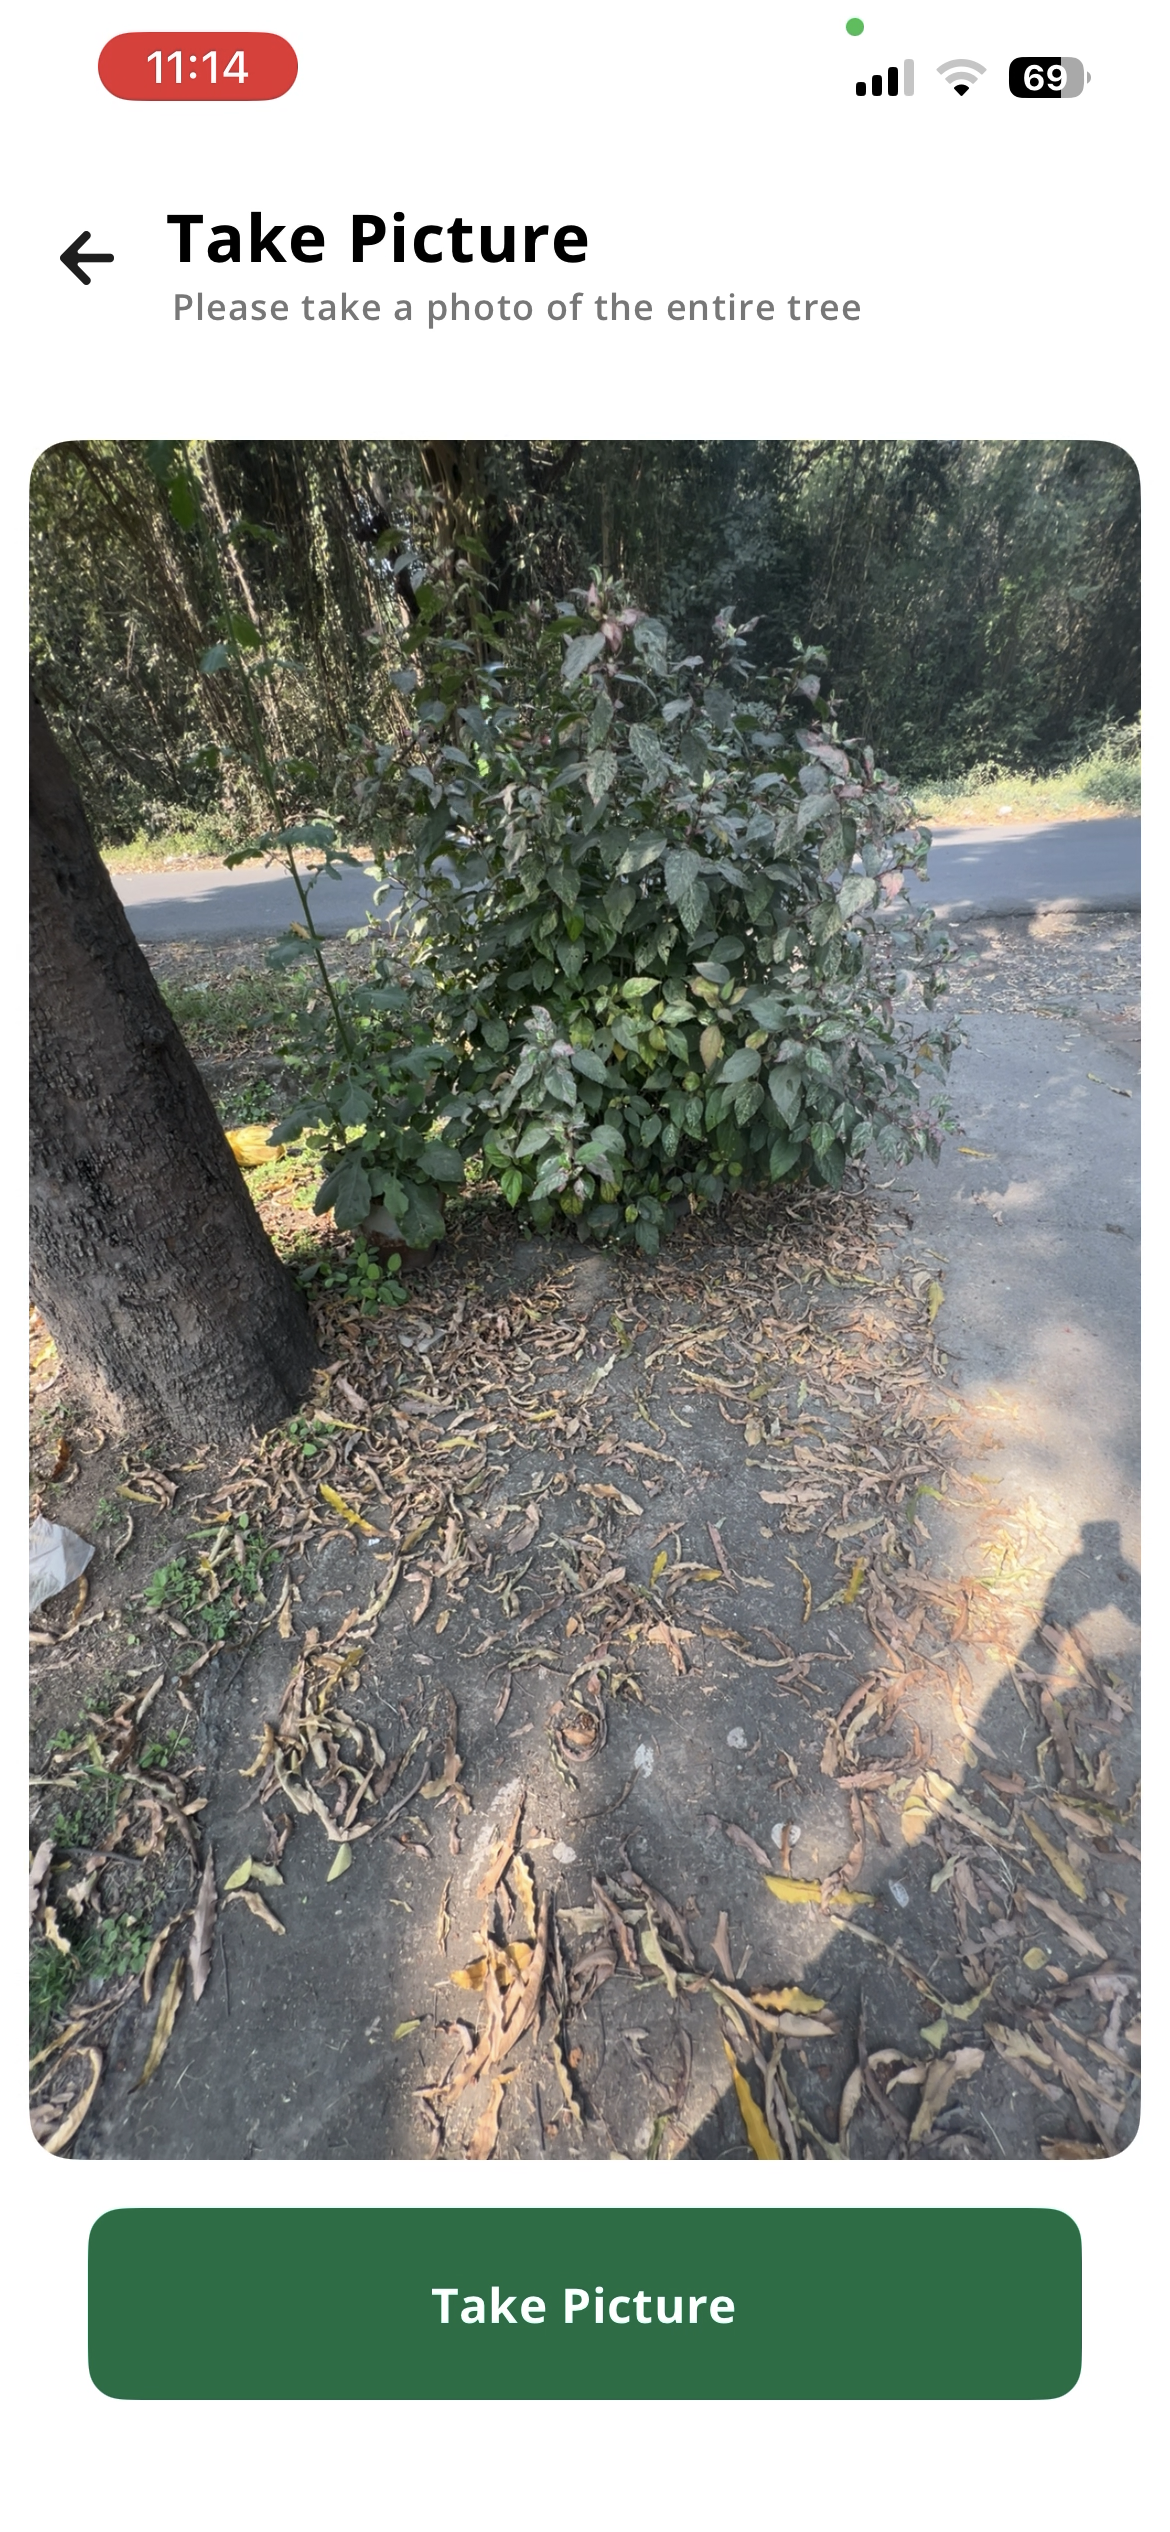
Photo Capture
Screenshot of camera interface for taking intervention photos
Step 7: Add Measurements (For Trees)
For tree planting interventions, you can add measurements to track growth over time:
- Tree Height: Height of the tree or sapling
- Diameter: Trunk diameter measurements (DBH - Diameter at Breast Height)
- Planting Date: When the trees were planted (defaults to today)
- Other Measurements: Additional scientific data as needed
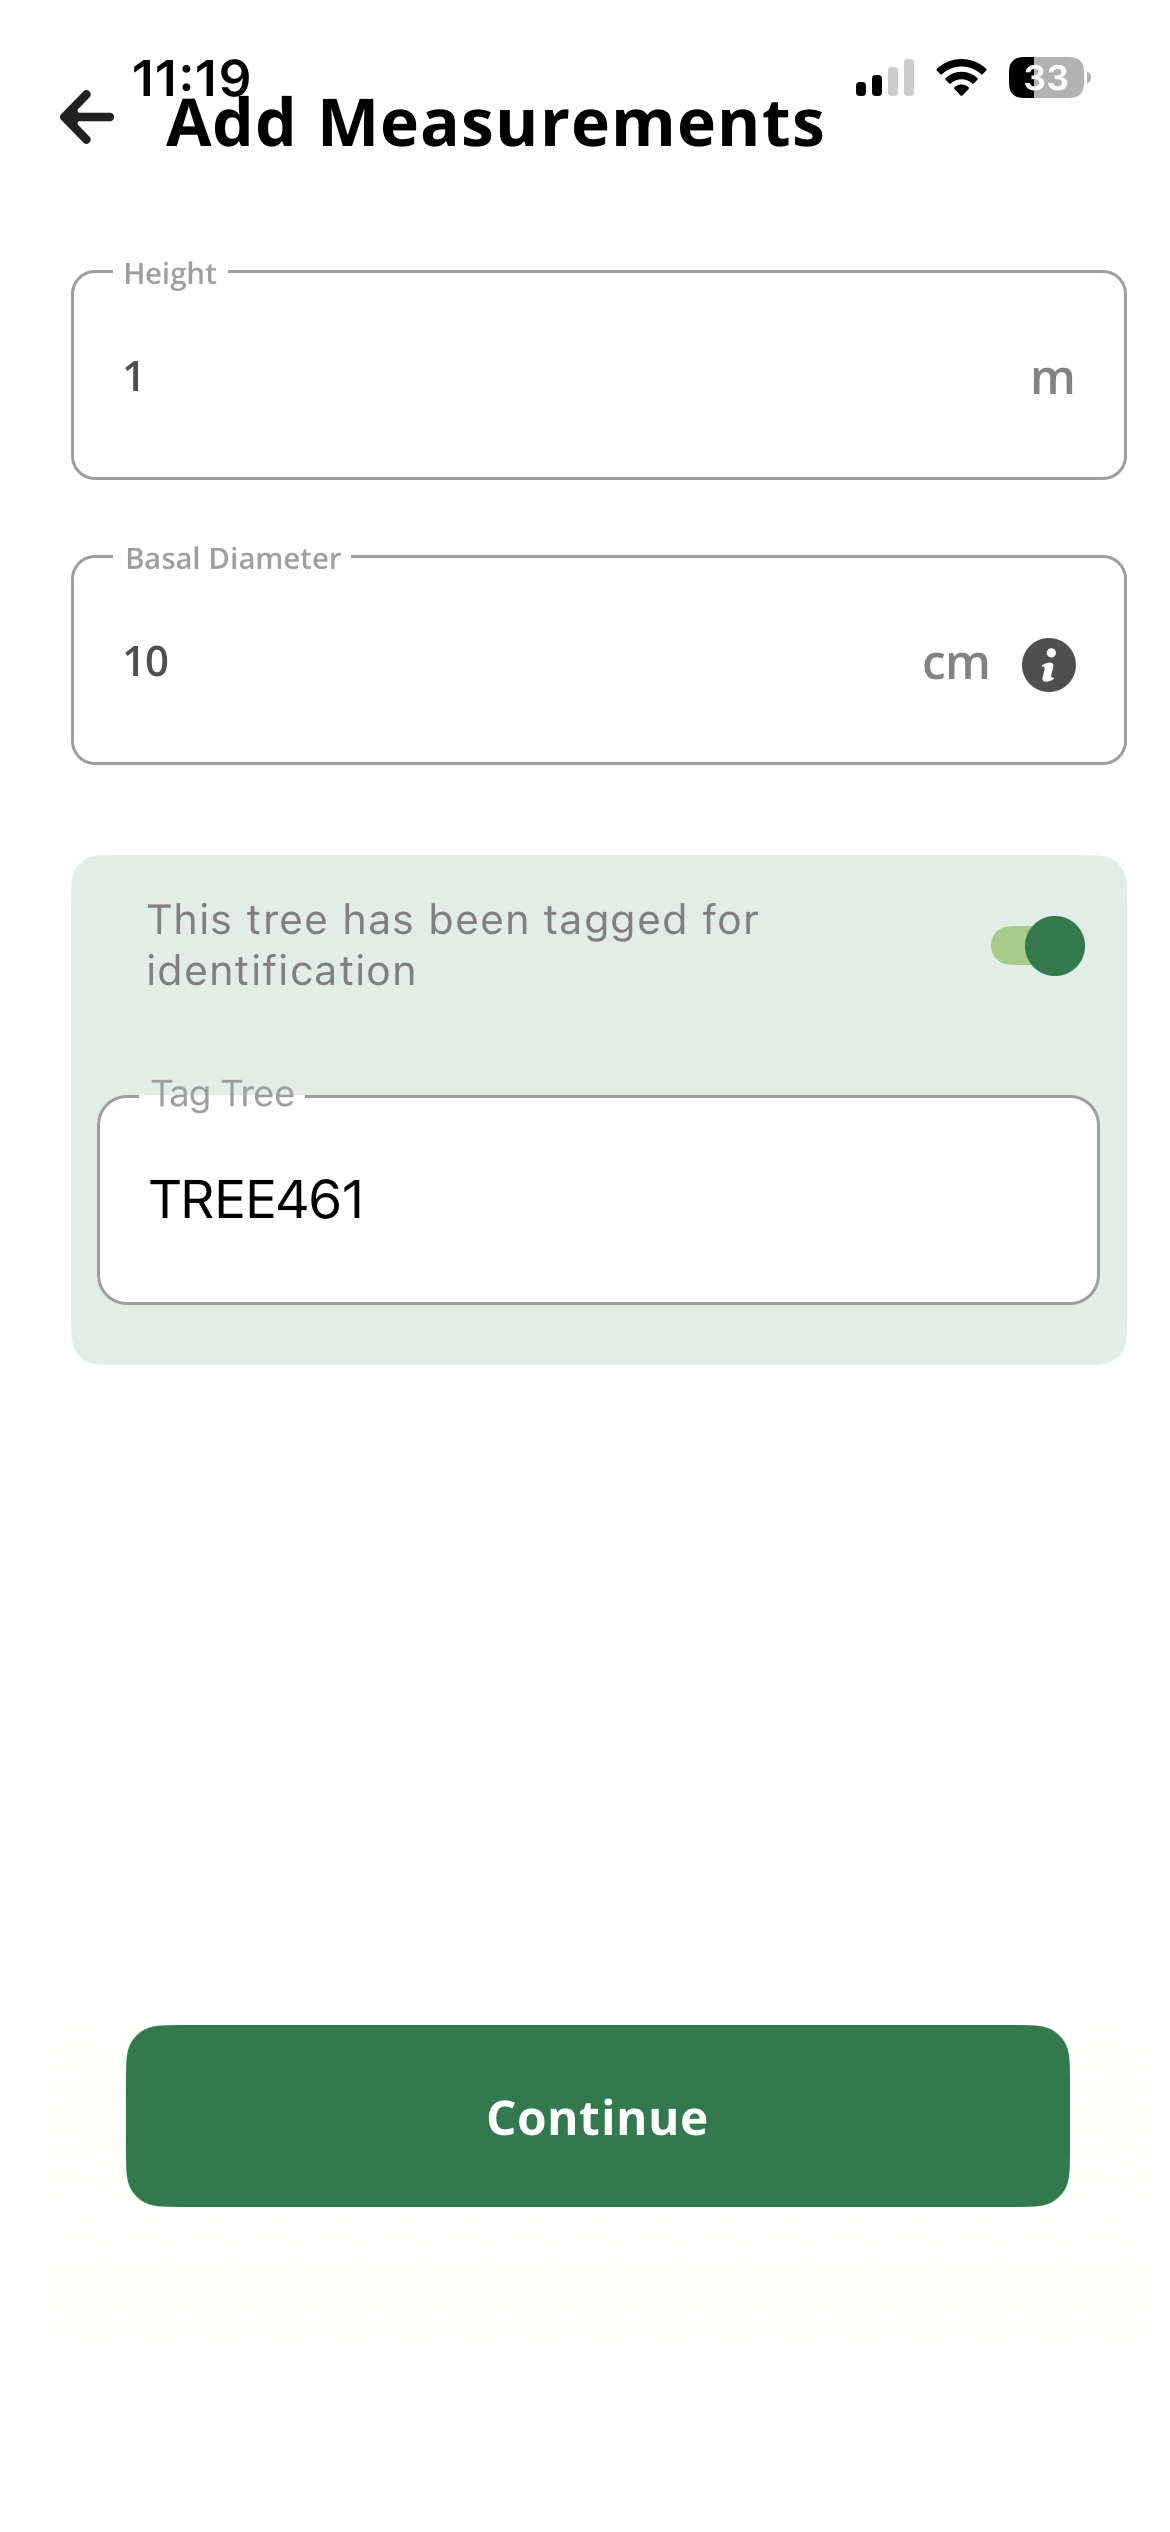
Measurements
Screenshot showing measurement input fields
Step 8: Add Optional Tags
You can add custom tags to categorize and organize your interventions:
- Tags: Custom labels for categorization (e.g., "monitoring plot", "restoration zone")
- Notes: Any observations or special conditions
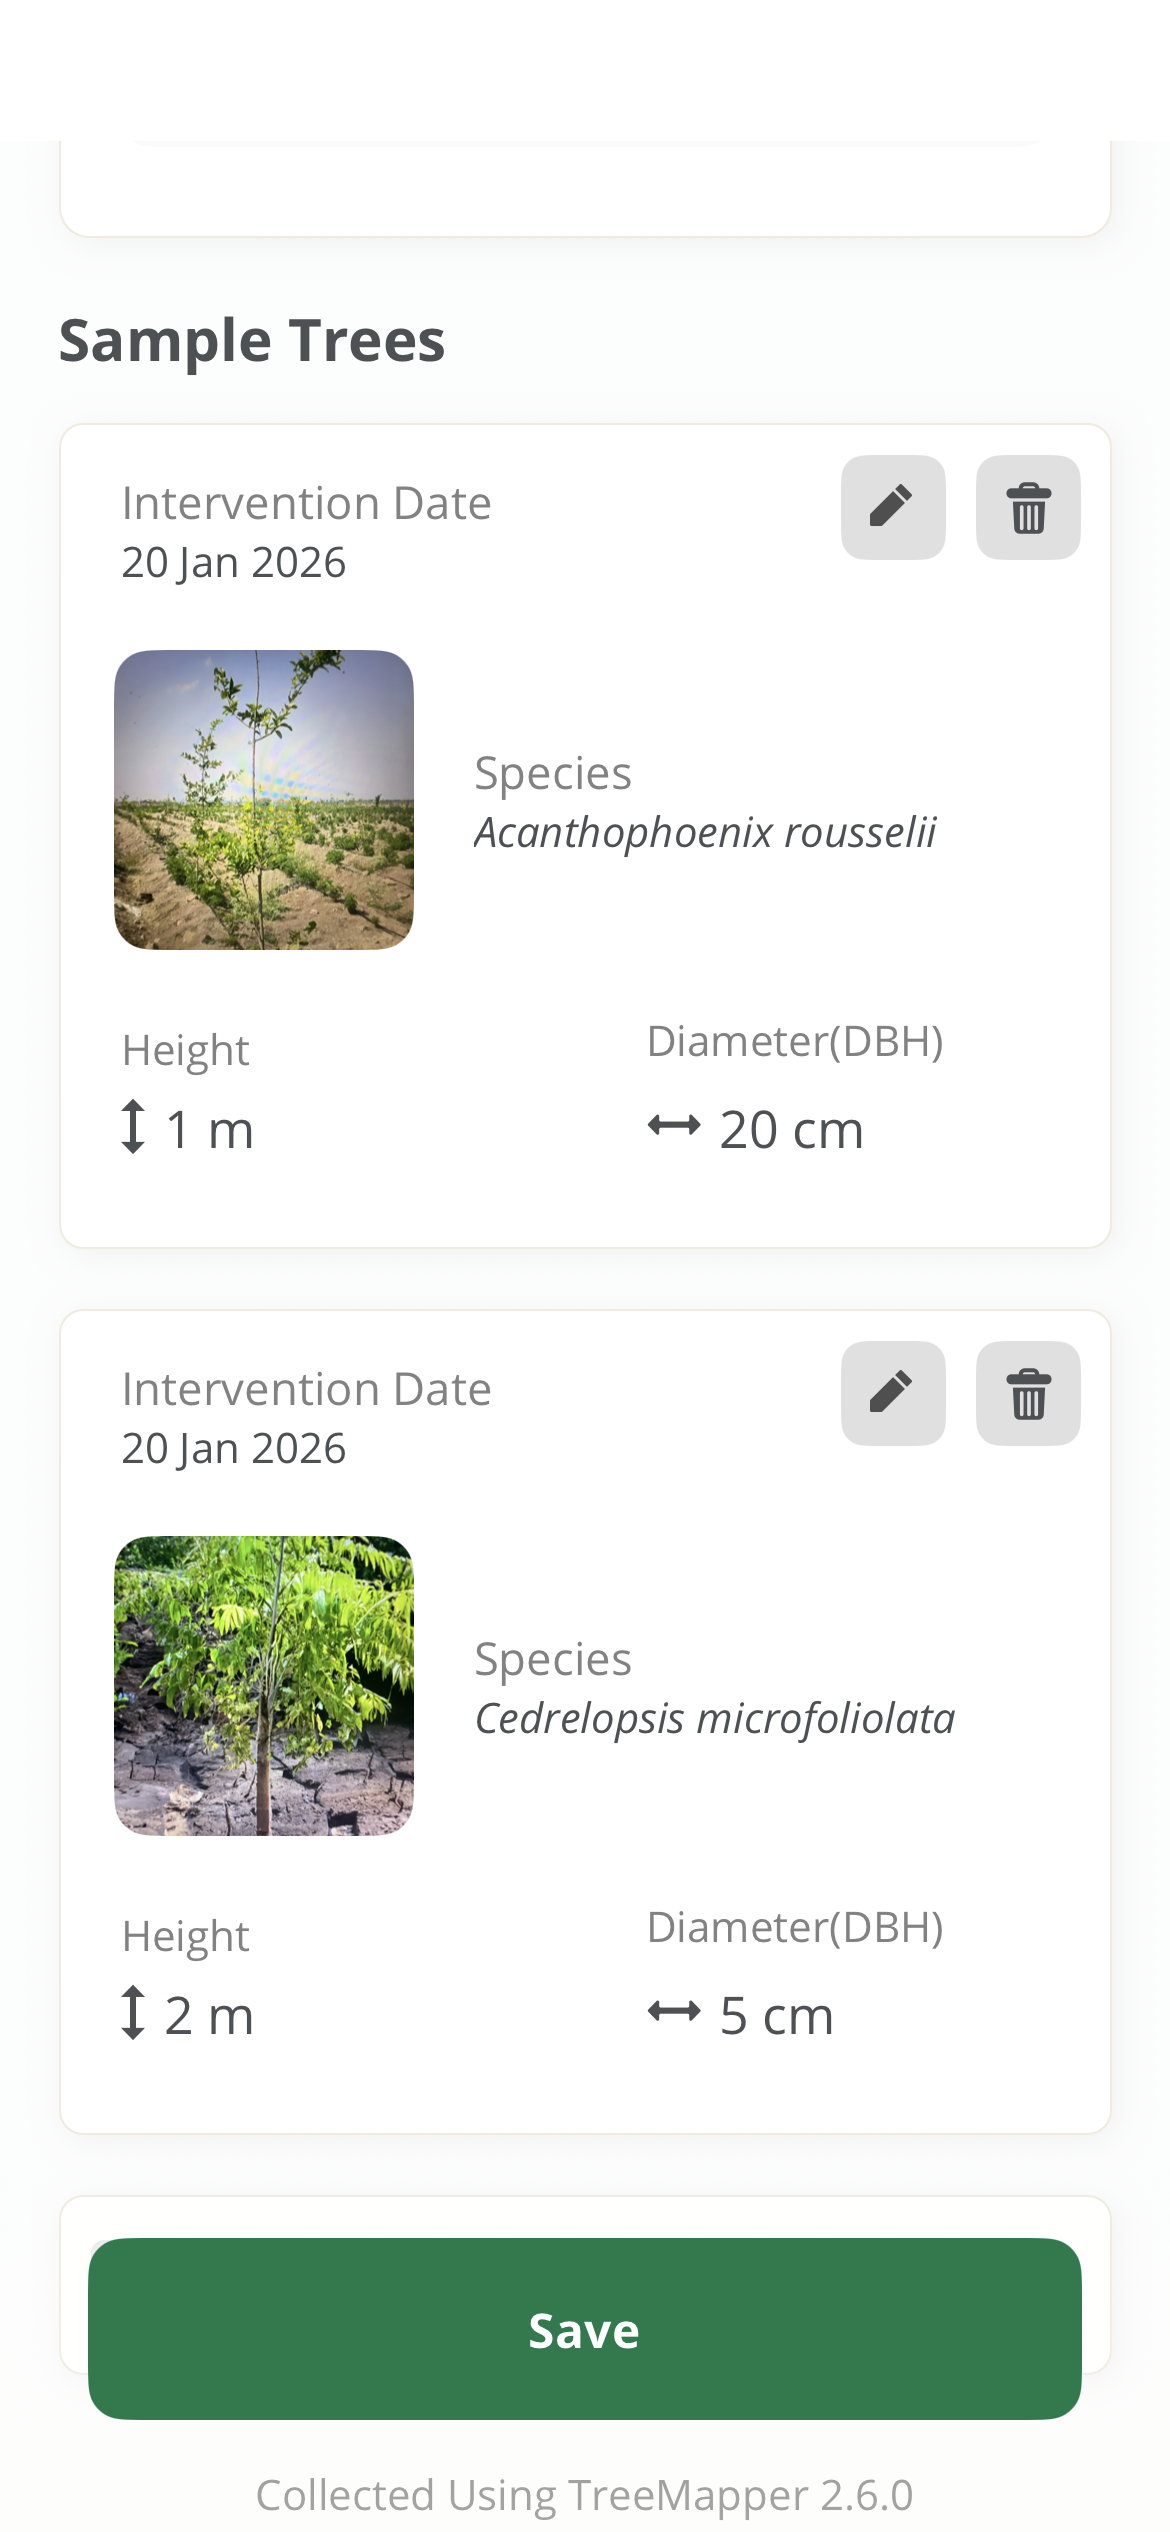
Understanding Sample Trees (Multi-Tree Interventions)
For Multi-Tree interventions, TreeMapper supports the concept of sample trees.Sample trees are random tree data points within your planted location that you can register for long-term monitoring.
Example
If you've planted 2000 trees in a multi-tree plantation with different species, you can register random sample trees (preferably of different species) from the location. Over time, you can monitor and remeasure these sample trees to assess the impact and growth of your restoration efforts.
Benefits of sample trees:
- Representative monitoring without measuring every single tree
- Track growth and survival rates over time
- Compare performance across different species
- Scientific data collection for impact assessment
To add sample trees in a multi-tree intervention, select individual trees within your planted area and register them with specific measurements and photos. These sample trees will be marked for future monitoring visits.
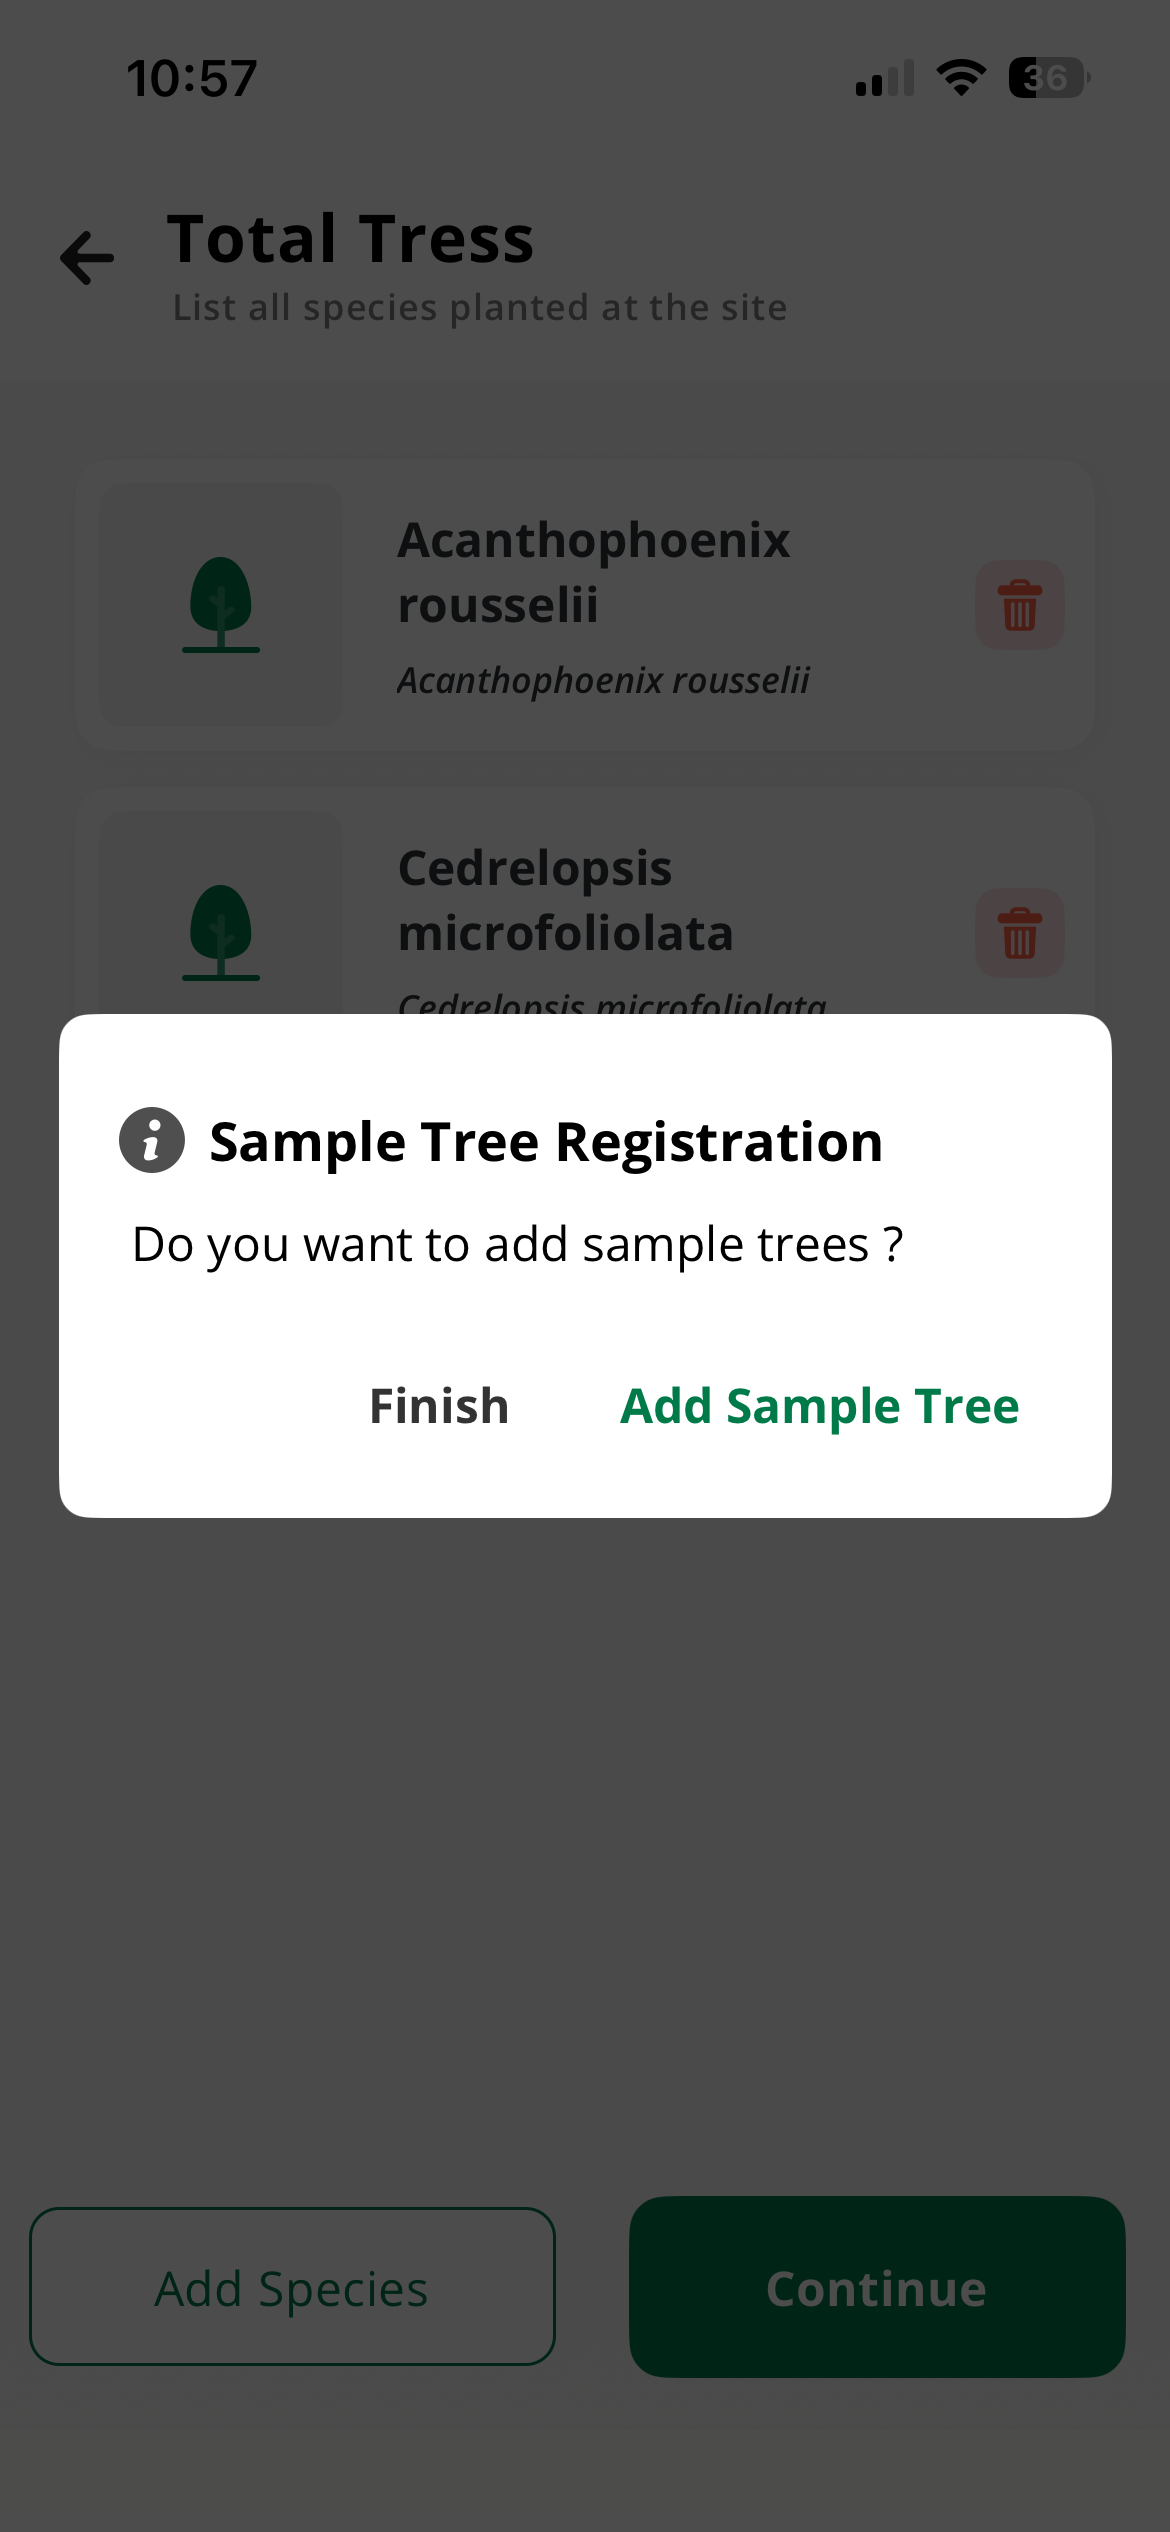
Sample Tree Prompt
Adding Sample Tree
After Planting Multiple Trees
All Sample Trees Preview
Sample Tree Prompt
Adding Sample Tree
After Planting Multiple Trees
All Sample Trees Preview
Step 9: Register Intervention
Once you've completed all the steps, your intervention is registered. You have two options:
Option 1: Export Data
You can export your intervention data directly from the app without signing in. This allows you to share or backup your data locally.
Option 2: Save and Upload to Server
If you're signed in, you can save the intervention and upload it to the server for:
- Cloud backup and synchronization
- Access from multiple devices
- Viewing on the web dashboard
- Team collaboration and project management
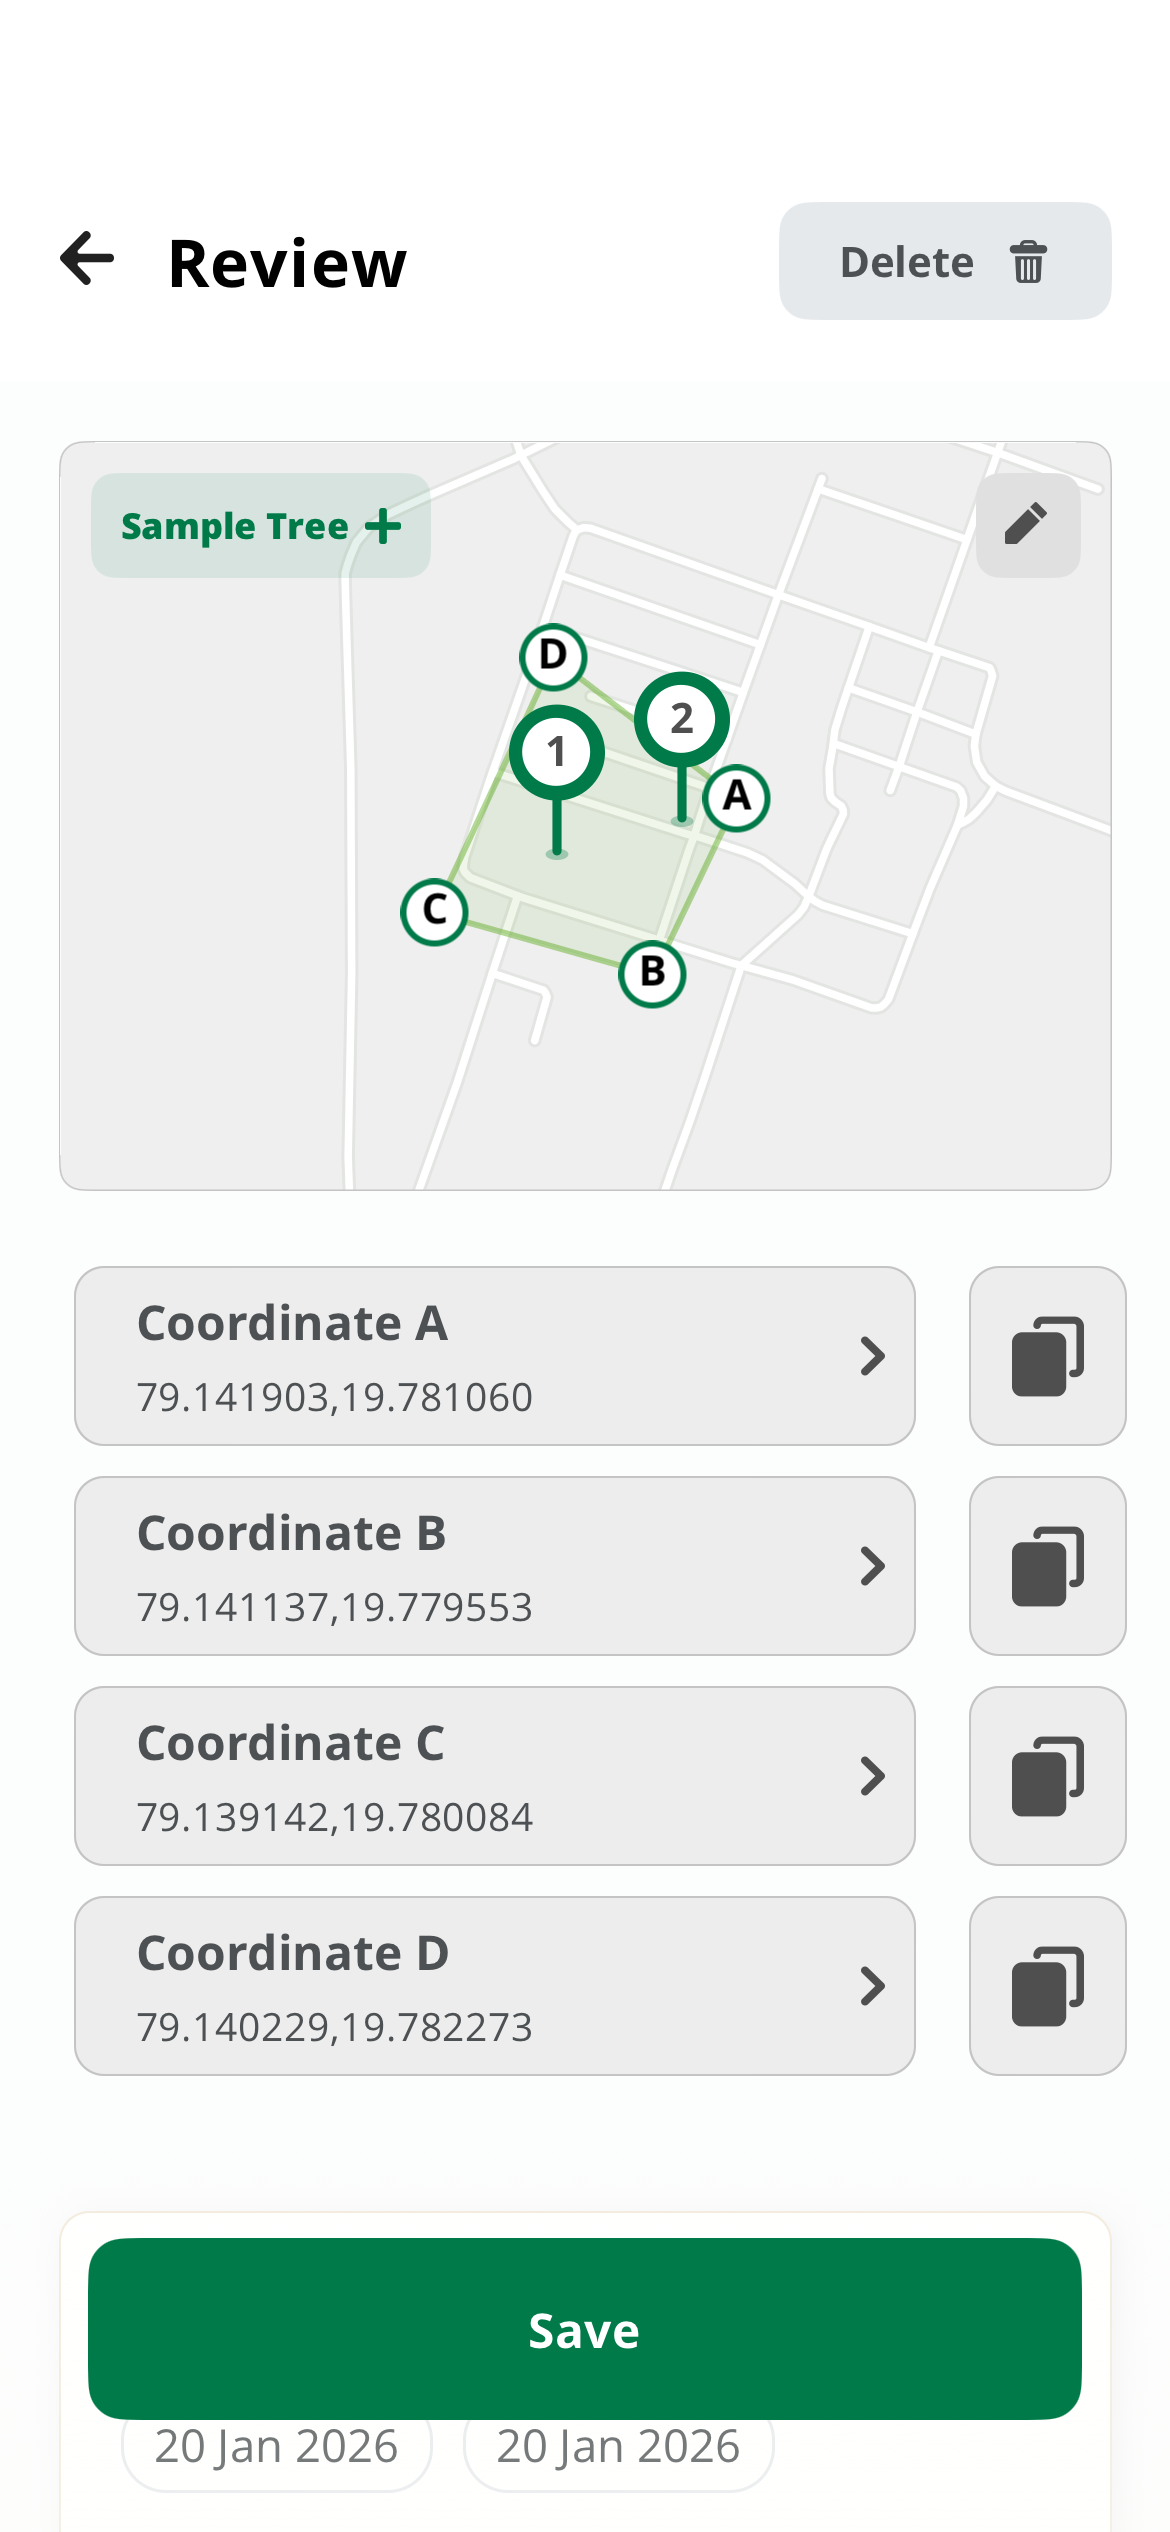
Before saving, review all the information you've entered:
- Check the location is correct on the map
- Verify species selection and tree count (if applicable)
- Ensure photos are clear and relevant (for tree planting interventions)
- Review measurements and tags
- Tap Save or Register
Review Screen
Screenshot of intervention preview before registration
Offline Mode
TreeMapper works fully offline! You can create dozens of interventions in the field without internet. Your data is saved locally and can be exported or synced when you reconnect. Learn more about working offline.
What's Next?
Congratulations! You've created your first intervention. Here's what to explore next:
- Set up monitoring plots to track tree growth over time
- Learn about taking measurements for scientific data collection
- View your intervention on the web dashboard to see analytics and reports
Common Questions
Can I edit an intervention after creating it?
Yes! Navigate to the Interventions tab, find your intervention, and tap to edit it. You can modify details, add more photos, or adjust the location.
What if I make a mistake?
Don't worry—interventions can be edited or deleted. If you've already synced, contact your project administrator for help with deletions.
How do I know if my intervention synced?
Check the Interventions tab. Synced interventions show a green checkmark, while unsynced ones show an orange cloud icon with "Pending Upload."